What is Windows ReadyBoost?
Windows ReadyBoost Feature was first introduced in Windows Vista and now it is part of Windows 7 as well as latest windows OS windows 8. ReadyBoost is a feature to make use of external USB flash drives, SD cards or CF cards as a hard disk cache to improve disk read performance.Let me explain this concept in little detail.
When you are running multiple applications simultaneously and your RAM cannot accommodate all of them, Windows store the data in RAM to your hard disk drive in order to free certain amount of RAM.As disk read time of Hard disk is much more than that of RAM, System performance decreases considerably.Here comes the role of ReadyBoost feature. ReadyBoost stores the data in the RAM to an External USB drive or SD card instead of Hard disk and if disk read time of USB drive is less than that of your internal hard drive, your system performance increases.Here one point worth noting that your USB drive does not work as extra RAM ,it is used just to store the system cache for fast retrieval.
When ReadyBoost is worth Using?
You might not see improved system performance on every system with windows ReadyBoost.If your Internal Hard disk is already enough fast (7200 rpm or fast),then you won’t be able to see noticeable change in your system.However if your hard disk drive is running at 5400 RPM or lower, you will see significant increase in performance.Also ,today’s most PCs comes with a lot of RAM installed (2GB-4GB).In such cases it might not worth much making use of ReadyBoost.
If your system has low amount of RAM and your Hard disk read operations are not much faster, I would strongly recommend you to opt for ReadyBoost. Even If you have a lot of RAM, give this a try to see whether it helps to make your system faster or not.
How to Use ReadyBoost?
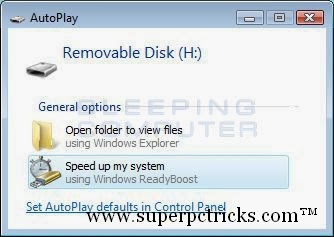
Using an external flash drive or SD card as ReadyBoost device is very simple.However your device must be ReadyBoost Compatible ,that is, it must met some minimu requirements.Whenever you plug in some USB flash drive in USB port and it is ReadyBoost compatible, you can see an option for ReadyBoost in autoplay.
 |
| Windows 8 screenshot to enable Readyboost |
 |
| Windows 7 screenshot to enable ReadyBoost |
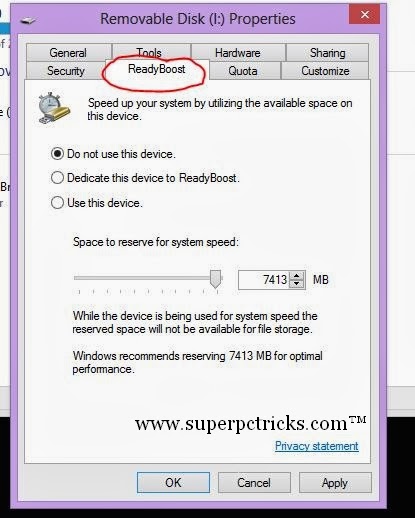
Alternatively, you can launch ReadyBoost option by right clicking on USB flash drive and selecting Properties and then selecting Readyboost tab.
Next Select either Dedicate this device to ReadyBoost or Use this device.If you select the first one,you do not need to enable the device for Readyboost for each system startup and all the available space will be used as cache .After this select the amount of space you want to use for ReadyBoost by moving the marker.Last select Apply to start the Readyboost operation.Only that much memory that you configured for Readyboost is occupied and the rest space is still available for use.
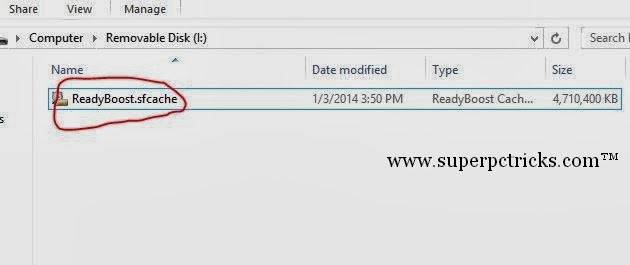
After configuring the ReadyBoost, a file with name ReadyBoost.sfcache will be created and not all the space will be available for use(depending upon the amount you allocated to ReadyBoost).
Conclusion
Whether you should go for ReadyBoost or not ? This mostly depend on your system.If You have lower amount of RAM and your internal hard drive is not much fast,ReadyBosst can be a great remedy for your slower system.On the other hand if you are on a quite fast system,you might not see much performance increment .But if you have a spare USB flash drive or SD card ,just try it and explore the windows to see change in performance.
Have any questions regarding Readyboost, make use of the comment box. Please, share your experience of using ReadyBoost.

