Sometimes, we do not take take precaution while removing USB drives/SD cards from the computer and end up corrupting them. Next time, when you plug in your USB drive, the system says – You need to format the disk in drive before you can use it. When you click on the format disk option and perform format, another error shows up – Cannot format the disk : The disk is write protected. This becomes very annoying as you cannot access your USB pen drive/ sd card/hard drive and also cannot perform format.
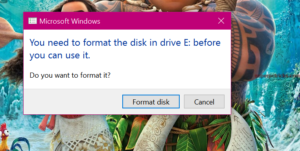
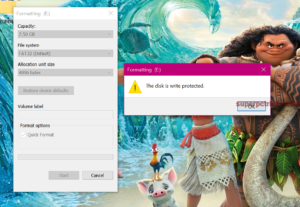
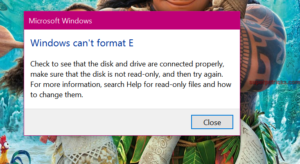
In such scenario, you can try some methods to remove the write protection from your USB drive to make it reusable. If you are getting any of the above errors, it means that either the file type system on the disk is raw and windows cannot recognize it or the disk is write protected and you do not have sufficient permissions to modify it. There is also possibility that the disk is physically damaged beyond repair.
In this tutorial, you can find detailed instructions on how to format a disk which is write protected.
How to format a write protected disk/ USB drive
- If you are using a SDHC card or a Micro SD card (with adapter), make sure that the lock switch is not turned on. Micro SD card adapter(and some USB drives too) has the option to lock the card so that the user is not able to perform any write operation. But if the lock switch is already off, move to the next point.
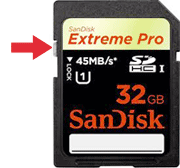
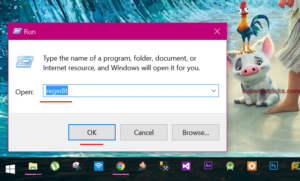
- Next, there might be possibility that the write protection has been assigned in the windows registry. In order to remove the read only protection, start Run program(Win key+R), type regedit and hit enter. This will open the registry editor.
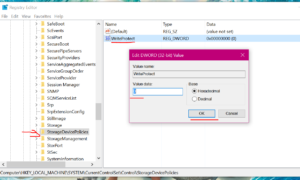
- Now navigate to the location HKEY_LOCAL_MACHINE\SYSTEM\CurrentControlSet\
Control\StorageDevicePolicies
and write click on the WriteProtect and select Modify. Change the value field from 1 to 0. Click OK and close the registry editor. Restart your system and check whether you can format your USB disk or not.
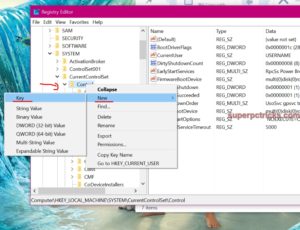
- If you cannot not find the StorageDevicePolicies folder, you need to create one and then set its value to 0. To create a new key right click on the Control folder, select New and then select key. Name the folder StorageDevicePolicies .
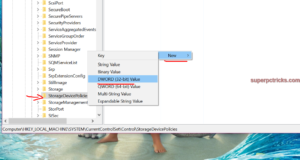
- Click on the created folder and right click on the right side and select New > DWORD(32-bit) value. Name the key WriteProtect and set its value to 0. Click OK, exit Regedit and reboot your computer. If, even this doesn’t work, skip to the next step.
- Press Win key + X and select Command prompt(Admin). Type DISKPART and hit enter. Next type list disk. This will show all the drives connected to your system. Recognize them on the basis of their size. Note the number of disk drive of which you want to remove the read only protection.
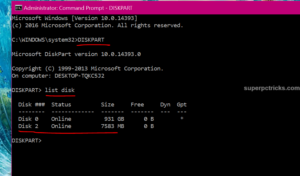
- Type the following commands one by one serially after hitting enter each time. Carefully note the number of your drive which is write protected. Performing command operations on the wrong disk drive can cost you all the data on that drive.
– Select Disk 2 (Remove 2 by your disk drive number)
–attributes disk clear readonly
–clean
–create partition primary
–format fs=fat32
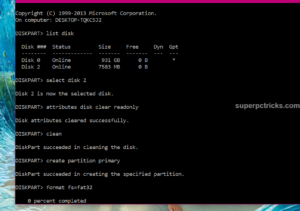
Wait for the diskpart to complete the format. After completion of the format, Type EXIT to exit from the diskpart and close the command prompt window. Again, check whether you can access your USB drive/SD card or not.
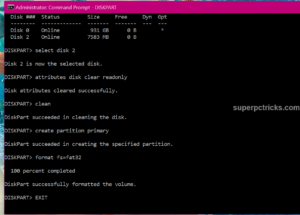
- If in the above process, you get an error like this :
No usable free extent could be found. It may be that there is insufficient free space to create a partition at the specified size and offset.
In this case, it is likely that your USB drive has been damaged permanently. But, if you want, you can still try the following step.
- Restart your system in safe mode and perform all the above commands(starting from DISKPART to the format fs= fat32).
If you still cannot remove the read only protection from your USB drive and cannot perform format, then you might need to replace your drive.
If you face any problem while following these steps, let me know in comment section. If this guide works for you, share your experience by commenting below.