Some power users may consider Firefox’s lack of vertical tab support a major drawback. Vertical tabs allow users to manage multiple browser tabs within a single window, using only a small amount of horizontal space. This means that each tab remains the same size, allowing users to quickly see the titles of each tab. In addition, if a user has more tabs open than can be displayed on their screen, they can easily scroll through the list using a mouse wheel or trackpad. Despite taking up some horizontal space, vertical tabs are a convenient way to manage multiple tabs in a single window.
Although I am not a regular user of Firefox, I recently began exploring the privacy-focused fork called Librewolf. However, I was quickly reminded of why I had previously stopped using Firefox: neither Firefox nor Librewolf offer official support for vertical tabs, unlike Microsoft Edge, Vivaldi, and other newer browsers like Arc.
Although vertical tabs are not officially supported in Firefox or Firefox-based browsers like Librewolf, there is a way to set them up using a browser extension and customizing the Firefox menu. This allows the horizontal tab row to be hidden, freeing up more screen space. It should be noted that this is not an official feature and requires a bit of setup. However, some users may prefer this method over waiting for Mozilla to potentially introduce vertical tab support in the future. Here is a guide on how to set up vertical tabs in Firefox.
PICK A VERTICAL TAB EXTENSION
Of all the vertical tab add-ons available for Firefox, I have found Tree Style Tab to be the best. It maintains the appearance of the current Proton Firefox design. It also allows users to choose other layouts, such as the high-contrast theme and old Photon design. One helpful feature of Tree Style Tab is the ability to group tabs by dragging and dropping them on top of each other. The resulting group can then be expanded or collapsed by clicking on the arrow next to it. Vertical tabs are particularly well-suited for organizing tabs into groups in this way.
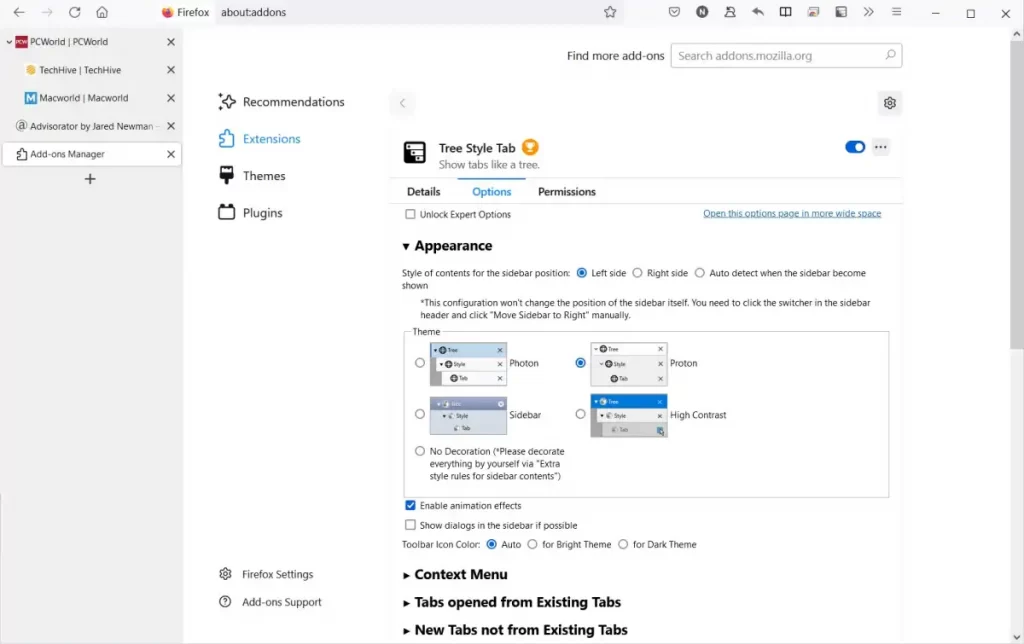
To begin using Tree Style Tab, simply install it from the Firefox add-ons website. Alternatively, you may want to try out other extensions, such as Tab Center Reborn or Sidebery. Tab Center Reborn lacks the ability to group tabs but includes a built-in search tool and can display larger thumbnail previews of each tab when space allows. Sidebery allows you to arrange tabs into tree-style subpages and also create multiple sets of vertical tabs that can be accessed through the top navigation bar.
HIDING FIREFOX’S TOP TAB
Now that you have installed a vertical tab extension in Firefox, you can proceed to mask the standard horizontal tab row at the top of the browser. To do this, you will need to use Firefox’s advanced customization feature that allows you to modify the menu system using CSS code. While this may seem intimidating, the steps to set it up are straightforward. First, you need to enable Firefox’s CSS customization feature, which is disabled by default.
To enable the CSS customization feature, follow these steps:
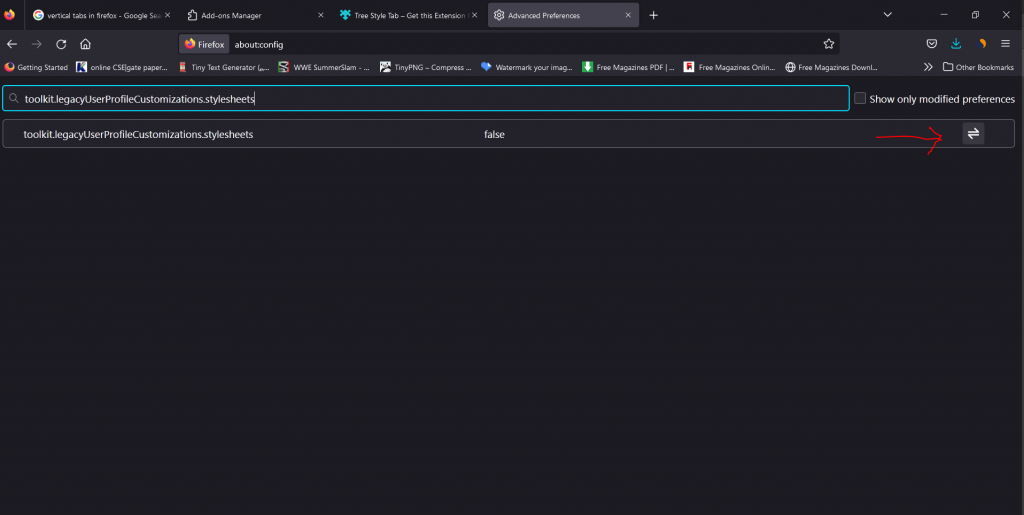
- Type about:config in the address bar and hit Enter. Then, select the option to “Accept the Risk and Continue.”
- In the “Search preference name” field, paste the following text: toolkit.legacyUserProfileCustomizations.stylesheets.
- Toggle the right button, so the preference is set to “true.”
Next, you must create a custom CSS file to hide the horizontal tab bar:
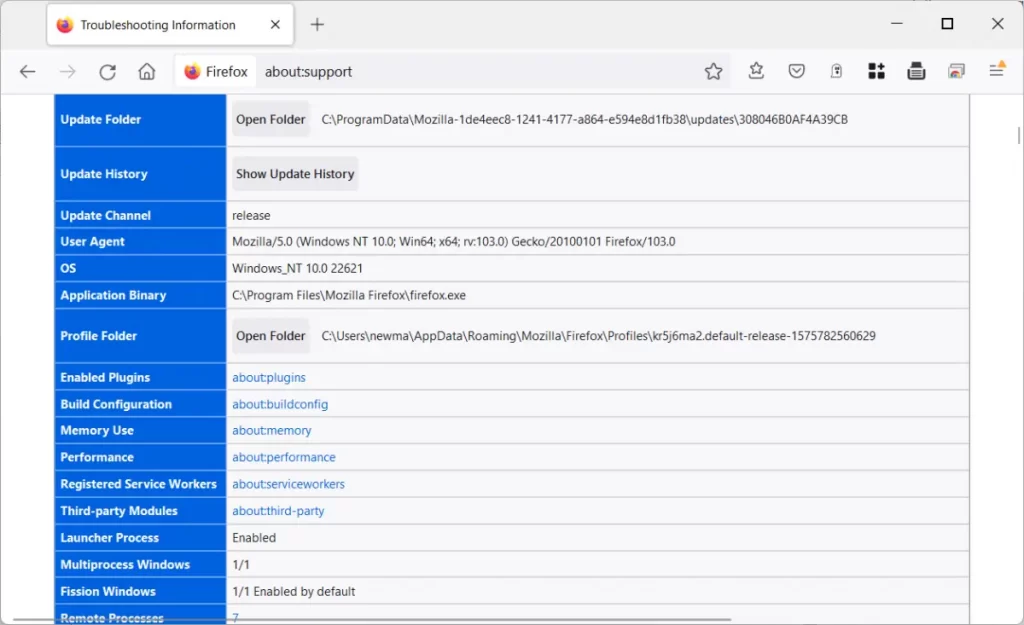
- Enter about:support in the address bar and press Enter.
- Scroll down to the “Profile Folder” section and click the “Open Folder” button.
- In the folder you opened in the previous step, create a new subfolder called “chrome.”
- Inside the “chrome” folder, create a new text file.
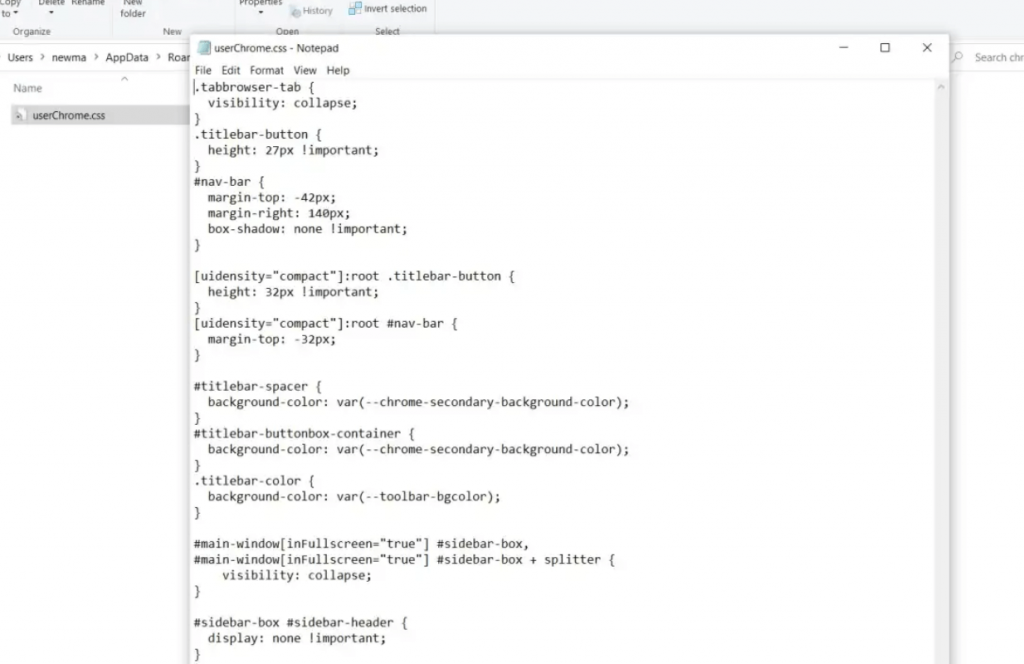
- Rename the text file to “userChrome.css” and make sure to use .css as the file extension rather than .txt.
- Open the “userChrome.css” file in a text editor such as Notepad.
- Copy all the text from here and paste it into the “userChrome.css” file.
- Save the “userChrome.css” file and restart Firefox.
After following the steps above, the horizontal tab bar should now be hidden, leaving only a streamlined menu bar with navigation buttons, the address bar, your extensions, and window buttons. The vertical tab bar will also be hidden if you enter full-screen mode. You can customize the top navigation bar by right-clicking on it and selecting “Customize Toolbar.” It may be helpful to add some flexible space next to the address bar, which allows you to click and drag the window around.
If you decide to restore the top tab row, you can follow these steps:
- Navigate to the “chrome” folder as described earlier.
- Delete the “userChrome.css” file or rename it to something like “hiddentabs.css.”
- Restart Firefox.
If you like to hide the top tab row again in the future, you can rename the “hiddentabs.css” file back to “userChrome.css” and restart Firefox.