Some Windows programs are resource hungry, that means they needed much more CPU processing power and RAM. Examples of such applications are high-end video games and video editing software. If such programs are not getting enough RAM and CPU, usually they end up crashing. You can prevent a high-end program from crashing by allocating more CPU and RAM to it compared to other standard processes.
You can allocate more RAM to a program in Windows 10 using a free program called Process Lasso. It monitors all running processes on your system and shows you which ones might be slowing it down. You can then assign more CPU and RAM to these problematic programs so that they run more smoothly. For this tutorial purpose, the program is tested on Windows 10. However, it works similarly for Windows 7 and 8.
To download the Process Lasso tool visit this link and choose version 9 for Workstations. Choose either 32-bit or 64-bit option depending on your PC.
- Open the downloaded setup file and proceed with the setup like any other program installation. On the Startup options screen, you’ll see options to start the program when anyone logs in, or only you do. Make your choices and click Next.
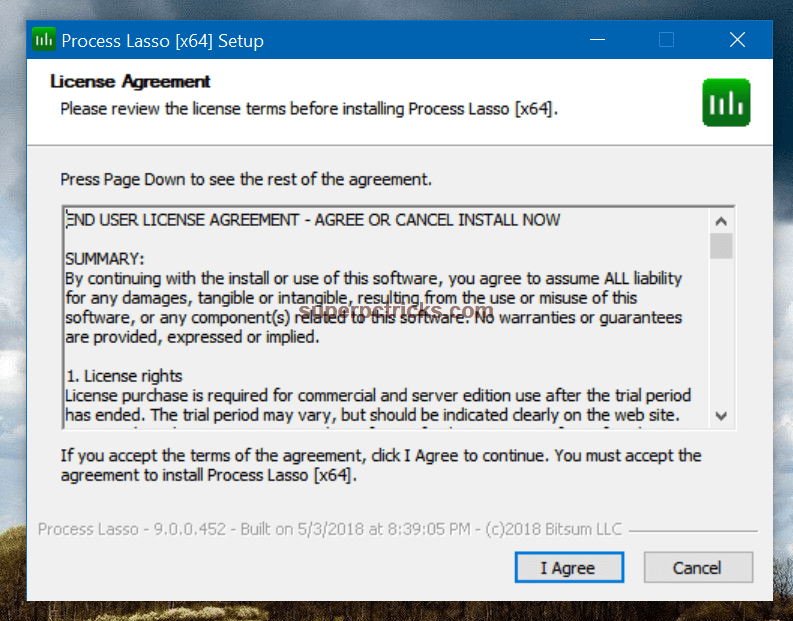

- After installation, run the program and minimize it. Use your PC generally for some time so that Process Lasso can monitor the resource usage.
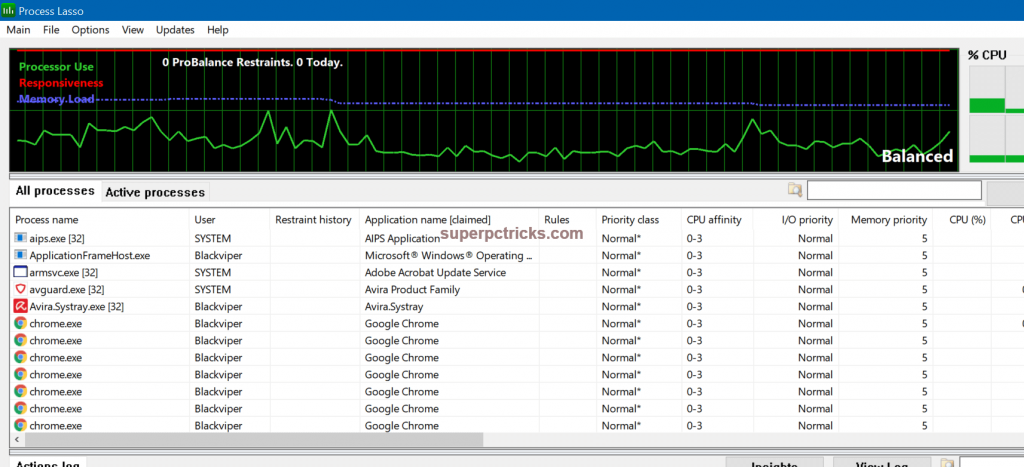
- When you maximize the program, you will see a live graph of your PC’s performance including its CPU and RAM usage. Below that, you will see all the running processes on your PC. You can switch to Active Processes tab to view the bar chart for the most resource hungry processes.
- Before setting a program to high priority and allocating more RAM, there are few default settings that you should tweak.
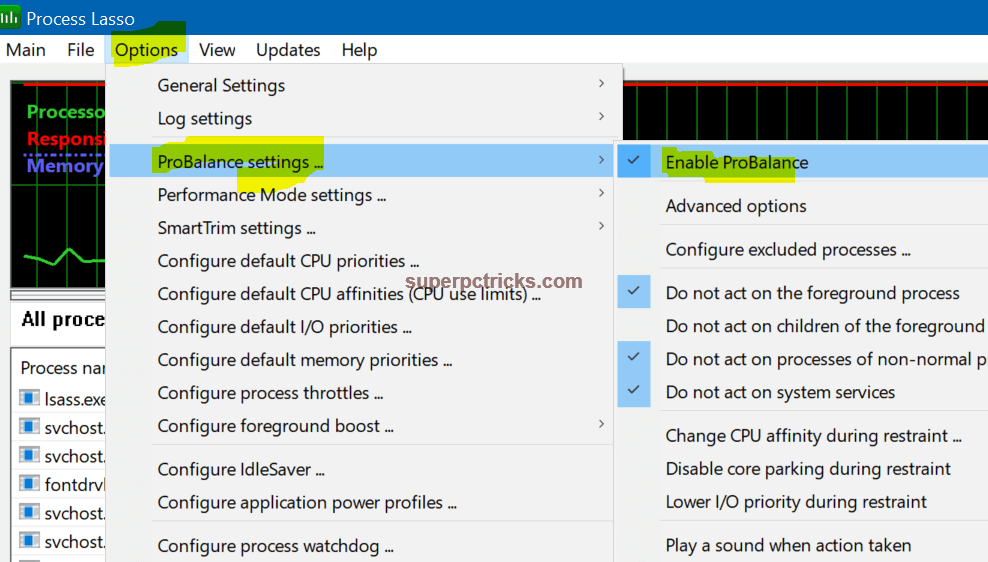
- First, click the Options tab, move your cursor to ProBalance settings and
then click Enable ProBalance. This manages your PC’s CPU usage automatically.
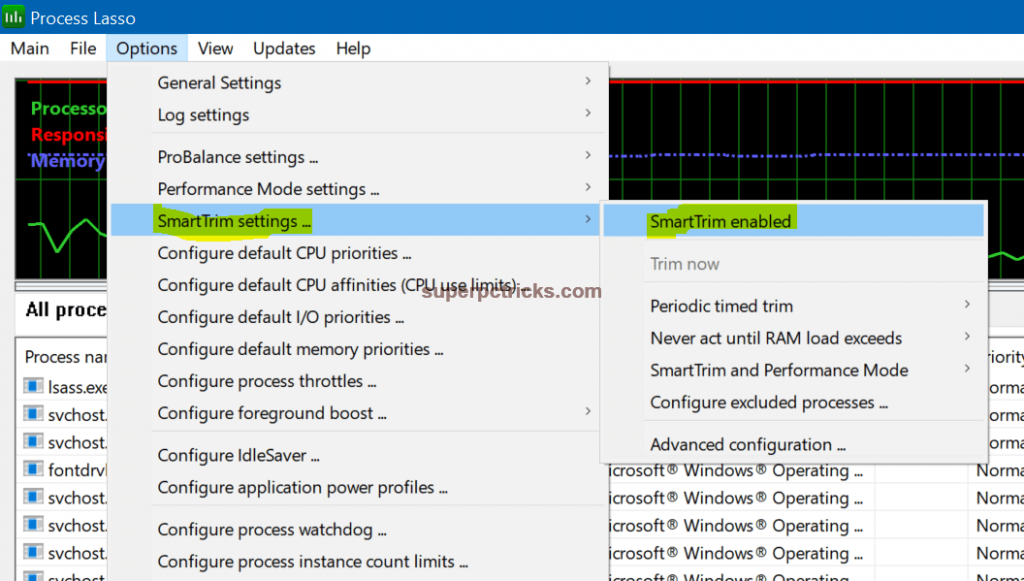
- Next, move your cursor to SmartTrim settings then click SmartTrim enabled. This automatically optimizes your PC’s RAM usage.
- Finally, click the Forced Mode option, then OK to ensure Process Lasso doesn’t revert to its default settings.
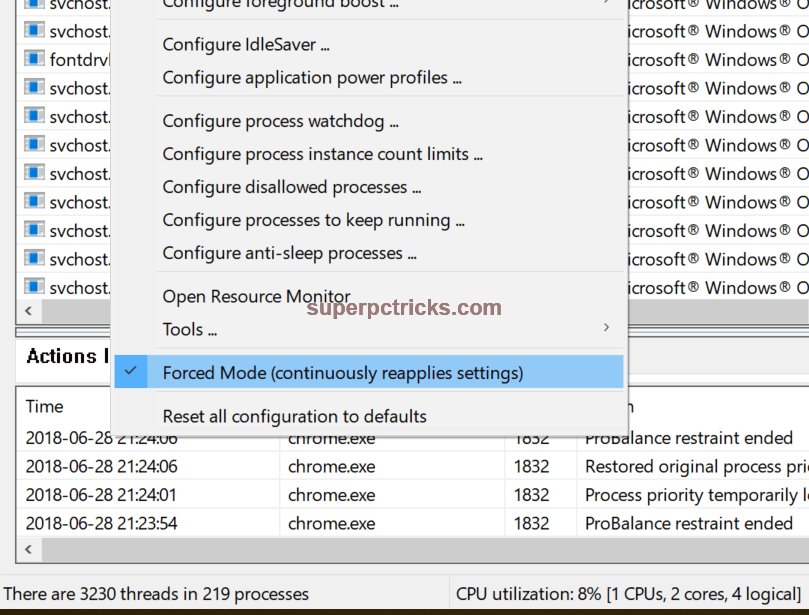
- Continue using your PC for some time. You’ll notice that the resource graph, CPU and RAM graphs should now be much lower than before.
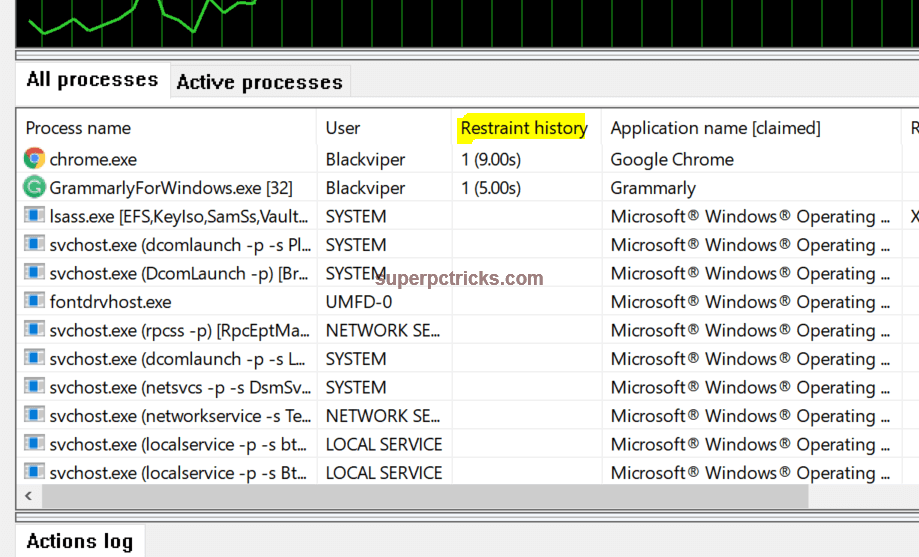
- The Restraint history in the All processes tab lists programs that are being restrained by Process Lasso because they were using up too much of your PC’s resources. We’ll show you how to allocate additional RAM and CPU resources to these programs so that they run smoothly. First, click the Restraint history column header to sort these processes.
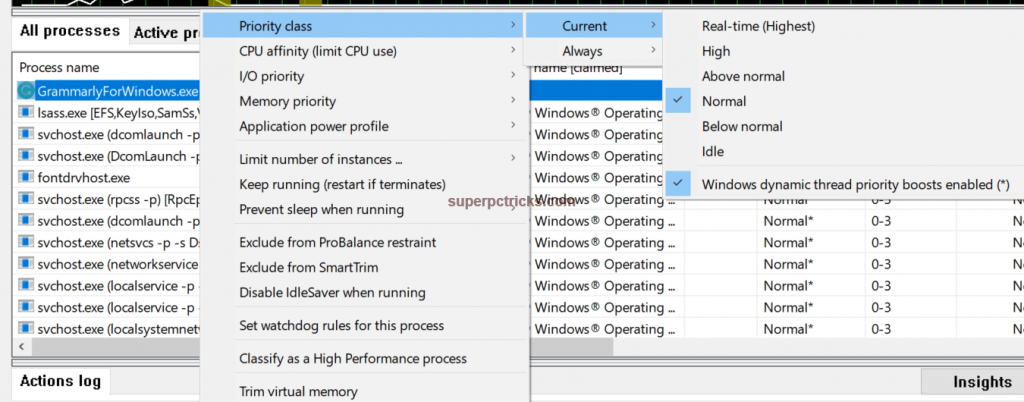
- To assign more resources to a particular program, right-click its process entry, move your cursor to Priority class, then Current. By default, all programs are assigned a Normal priority meaning they are allotted equal RAM and CPU resources. To prioritize a program, set its Priority class to Above normal or if that program has been known to crash your PC, set it to High priority.
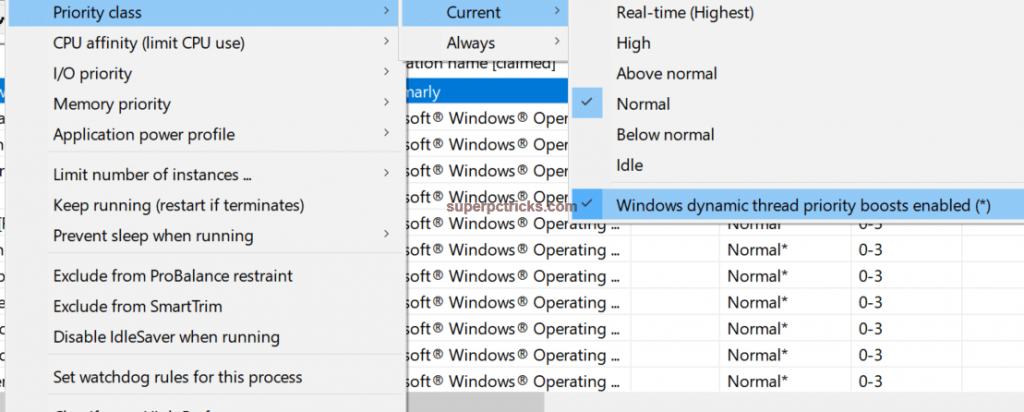
- Finally, tick Windows dynamic thread priority boosts enabled. Move your cursor to the Always column and repeat this setting.
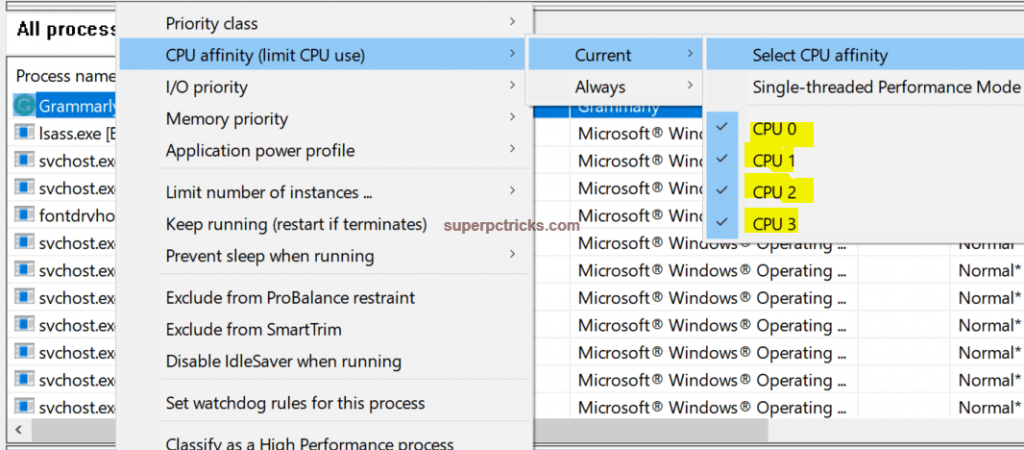
- Next, move your cursor to CPU affinity, Current and ensure that all your CPU’s cores are ticked. This ensures the program is assigned maximum PC resources. Move your cursor to Always and tick the same core boxes.
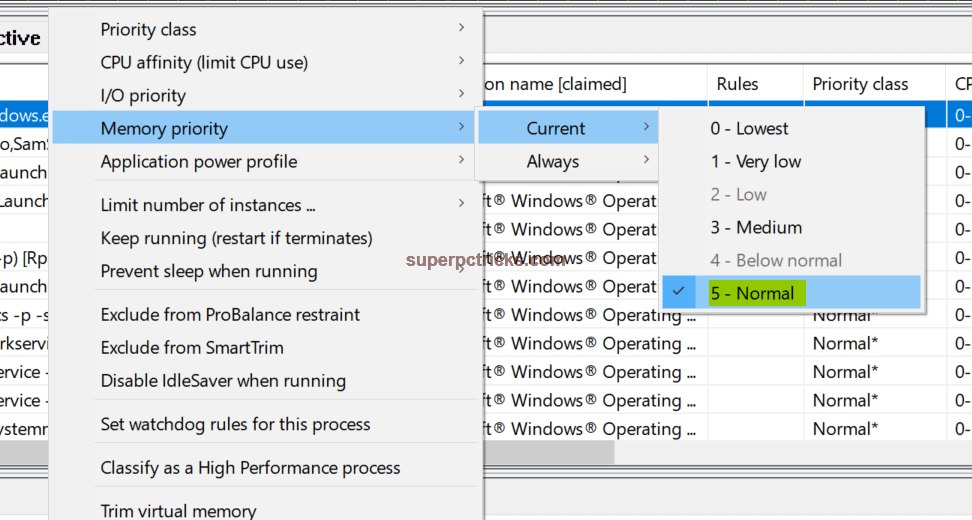
- Next, move your cursor to Memory priority. Ensure that both its Current and Always memory profiles are set to Normal. This will give a program more RAM than other programs.
- Repeat the above steps for any resource-hungry programs on your PC. These programs should no longer slow down or crash your PC.
There’s an easy way to quickly check whether the changes you made have the desired effect. Click the Active processes tab to see the live bar graph of running programs. You should see that they are using fewer PC resources than before.