It’s a good idea to encrypt your important files to protect them from hackers and others who use your computer. If you store sensitive data on a USB stick, you should consider using encryption to guard the data in case of theft or loss. There are more than one way and many different tools to create an Encrypted USB drive. In this article, we are going to share the best tool to encrypt files on your USB stick. Veracrypt is a superb free tool that lets you encrypt your USB stick with a password. Once you’ve done that, your USB stick will appear empty to anyone who tries to access it. We’ll show you how to encrypt your USB stick, then decrypt it to obtain your files.
Insert your USB drive into your computer and remove its data, or move it to your PC for now. Open My Computer and make a note of the USB stick’s drive letter because you are going need this later. To install VeraCrypt, go to VeraCrypt download page, then click the Windows download link at the top. Open the downloaded setup file, click Yes, tick to accept the terms and conditions. Click Next twice, then click Install. The application automatically creates a system restore point when you install it.
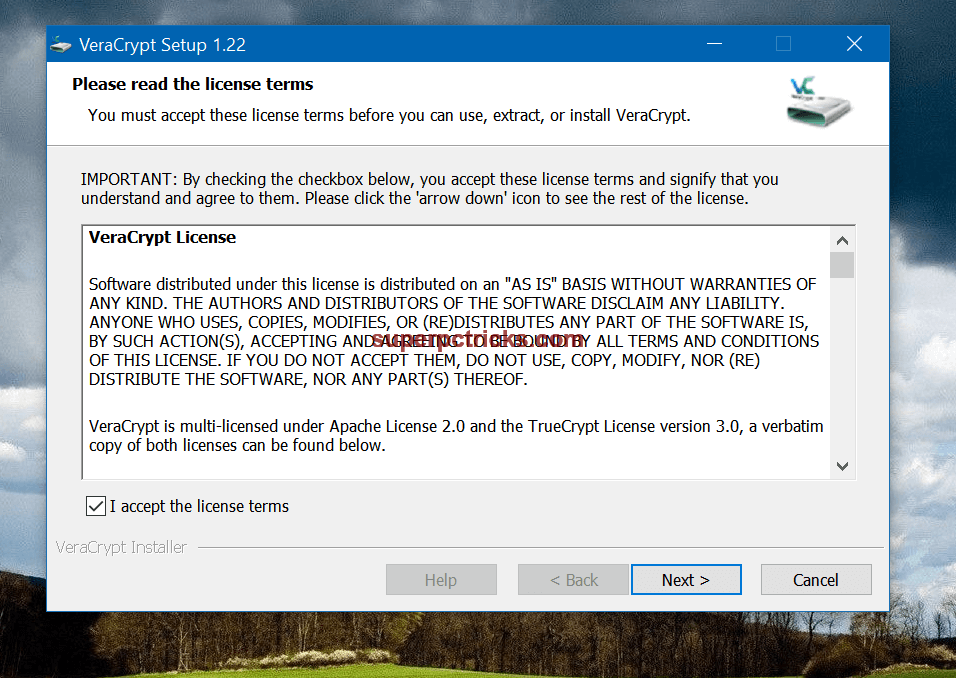
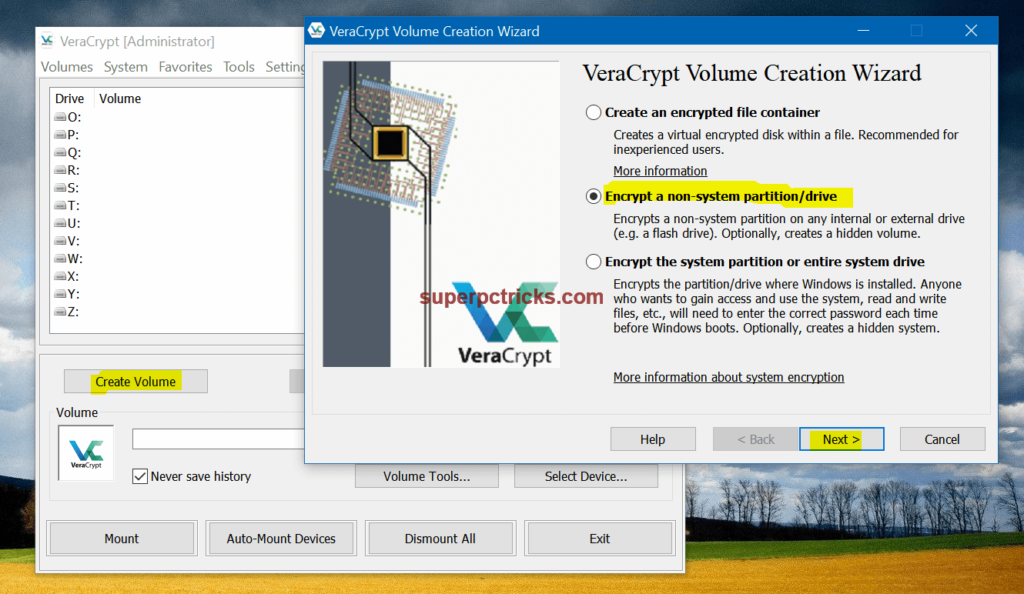
When you see the VeraCrypt has been successfully installed message, click OK, Finish, then OK again (to jump the tutorial and close the program’s setup window). Next, right-click VeraCrypt’s desktop icon, click Run as administrator, then click Yes to open it. You’ll see a list of drive letters in the main window. First, click Create Volume. In the window that opens, select Encrypt a non-system partition/drive, then click Next.
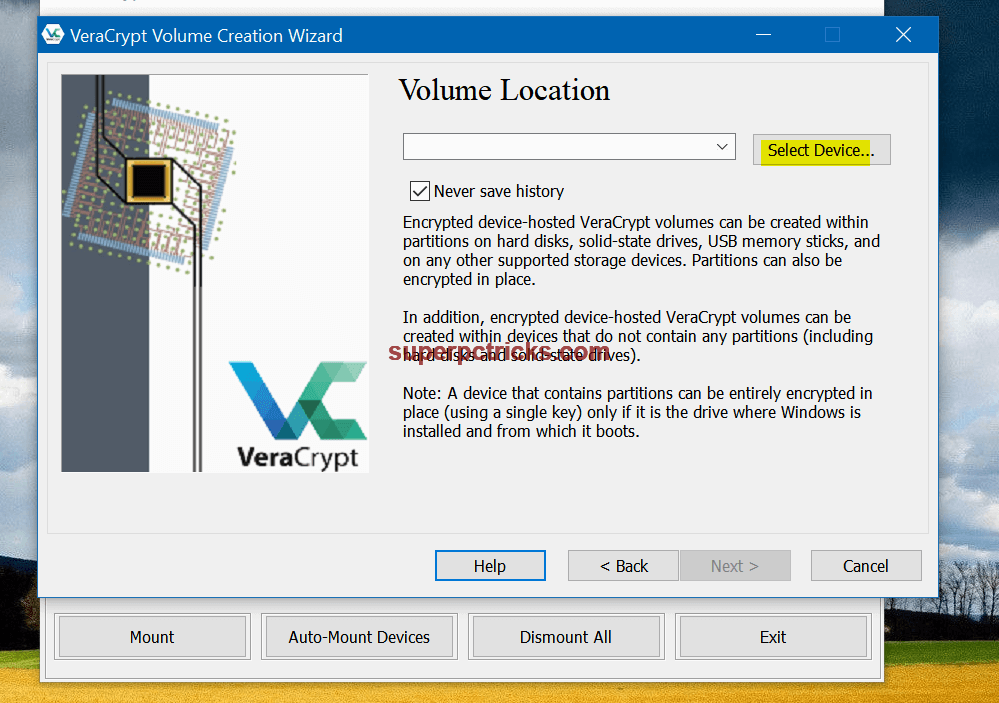
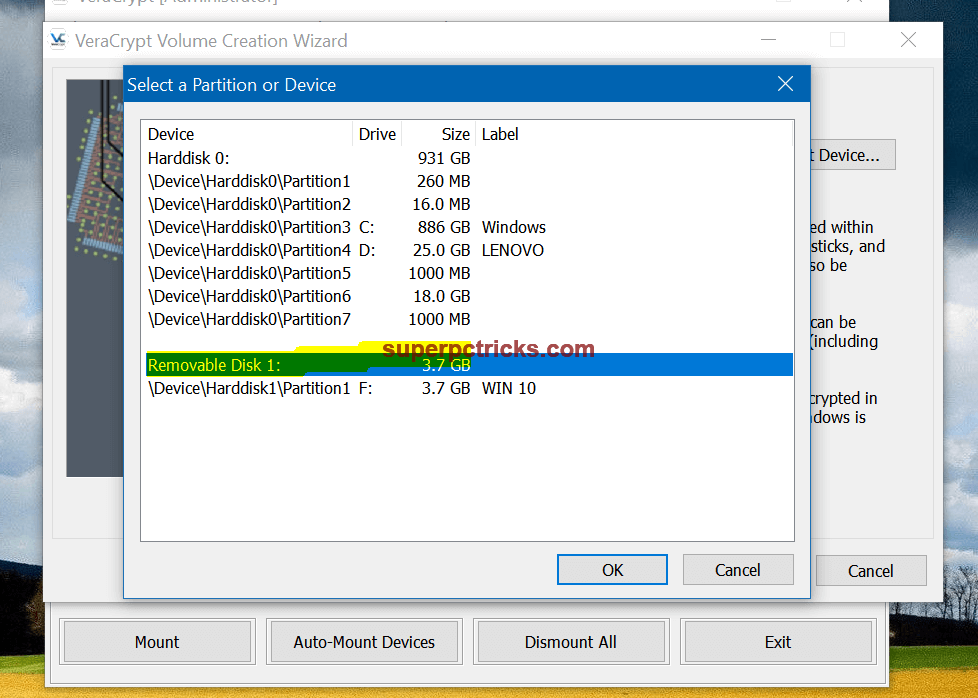
On the next screen, select Standard VeraCrypt volume, then click Next. Now click the Select Device button. You’ll see a list of all your PC’s drives including any removable ones that are connected to your PC. Select your USB stick, Click OK, then Next. On the following screen, select Create encrypted volume and format it, then click Next again.
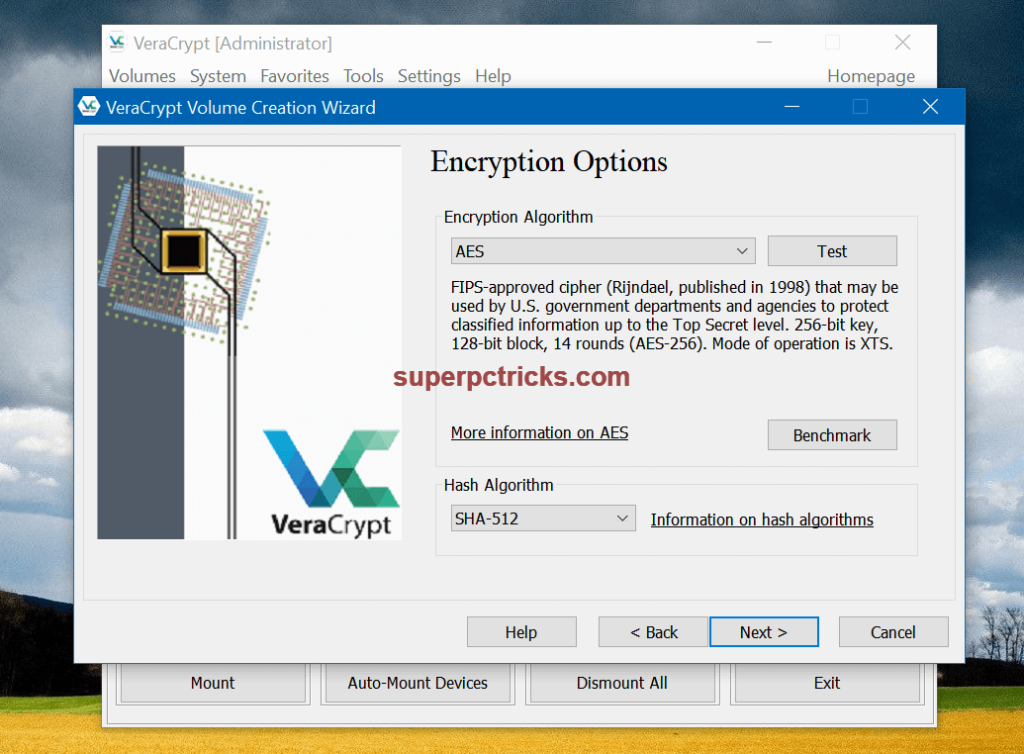
On the Encryption Options screen, you can adjust your encryption levels using the Encryption Algorithm and Hash Algorithm drop-down menus. The former has ten options you can pick from, and the latter has four. We believe the default encryption levels are more than sufficient, so we didn’t change them. Click Next.
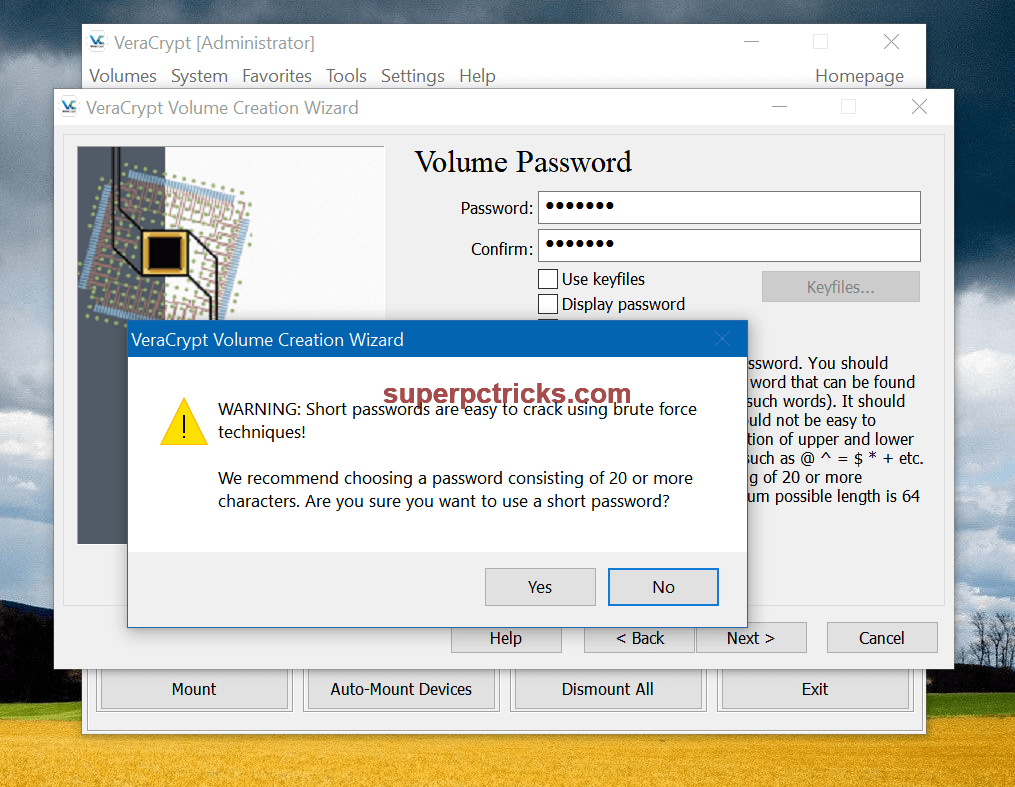
On the Volume Size screen, make sure the size (in bold letters) matches the storage on your USB stick, then click Next. Now type and confirm the password you want to use to decrypt your USB stick. VeraCrypt suggests a password containing 20 or more characters, but make it memorable because there’s no way to decode your data if you forget your password. Tick Display password if you want to make a note of it, then click Next. You’ll see an alert message if your password has fewer than 20 characters. Click Yes if you want to use it anyhow. Alternatively, click No to strengthen it, then click Next.
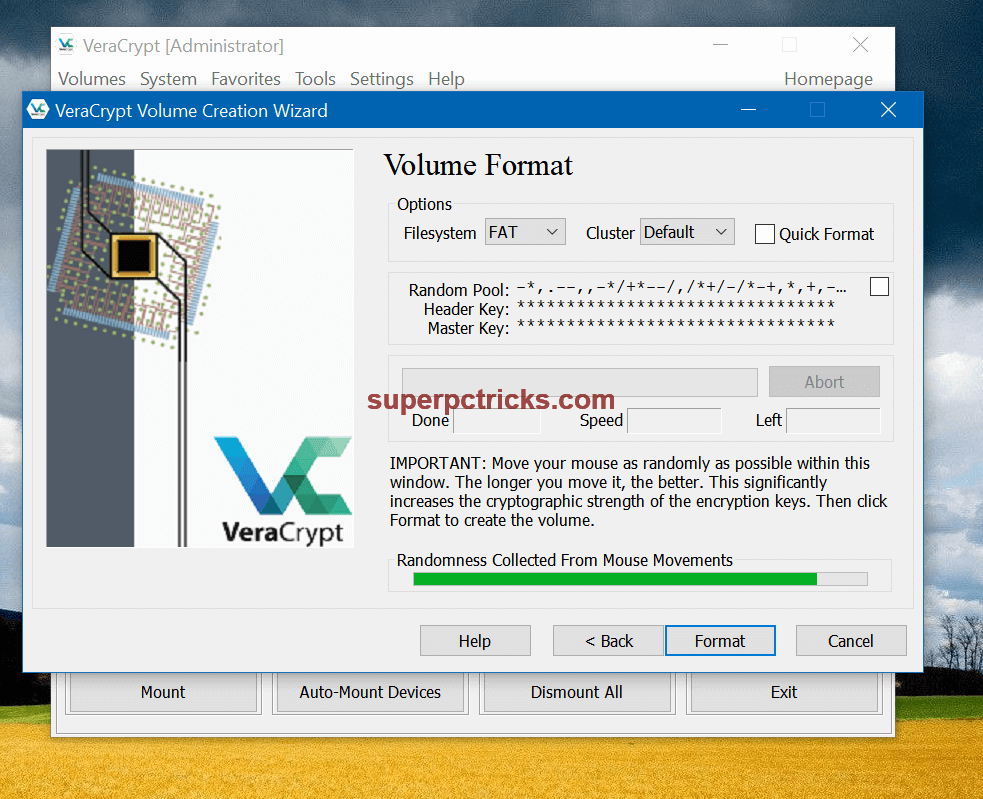
In the Large Files section, you can select whether you want to store large files (above 4GB) on your encrypted drive. Select Yes or No, then click Next. In the Volume Format section, you are prompted to move your mouse randomly within the window. This movement will strengthen your encryption level, shown by the progress bar which fills as you move your mouse. Leave the other values as they are. When the bar reaches the end, click Format, then click Yes to confirm.
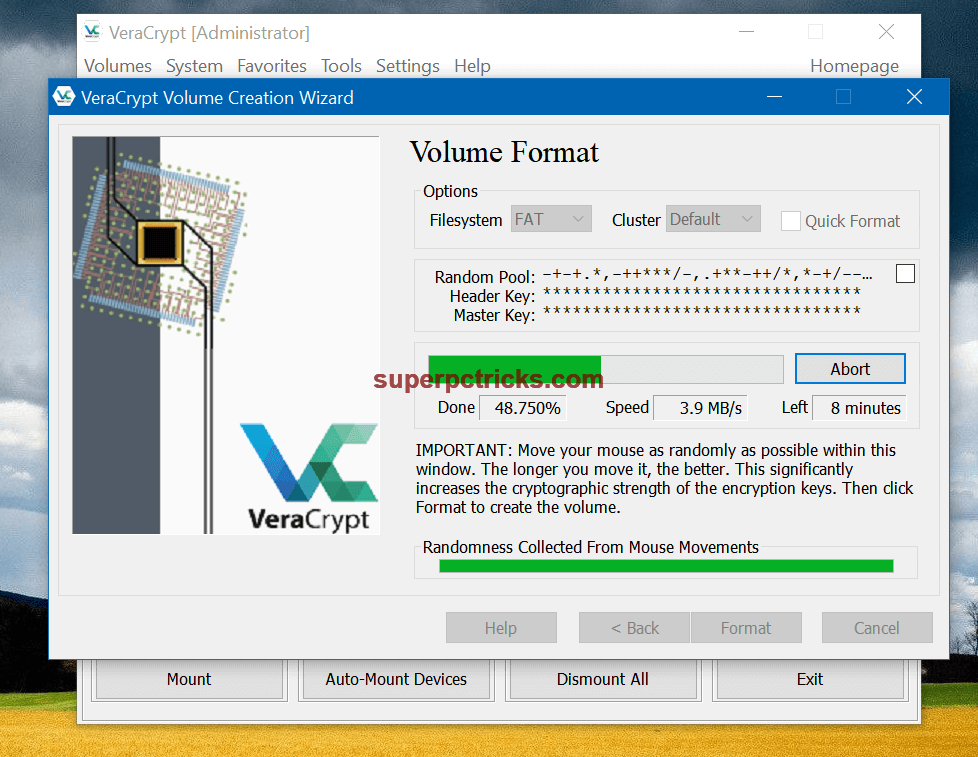
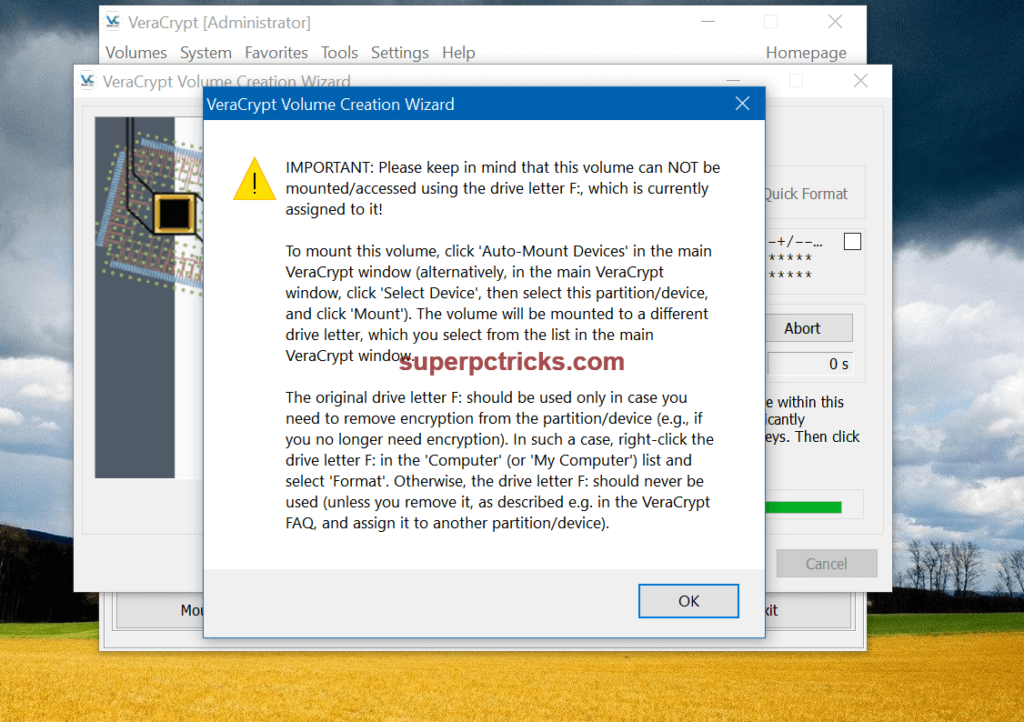
VeraCrypt will begin formatting your USB stick. You’ll see its advancement with the estimated time remaining in the field below. The process can take several minutes depending on the size of your USB drive (it took us 15 minutes to format a 4GB USB stick). After that’s done, you’ll see a message informing you that you cannot use the original drive letter that was used for your USB stick. Click OK twice, click Next, then close the program to finish your setup. Your drive is now encrypted and it can be accessed only through the password.
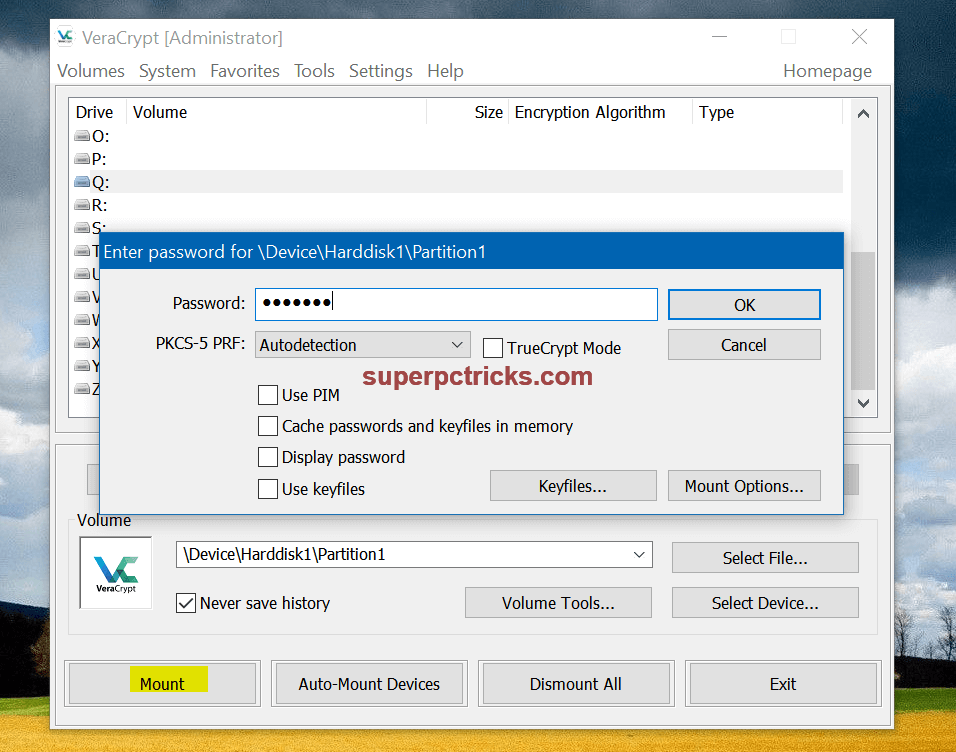
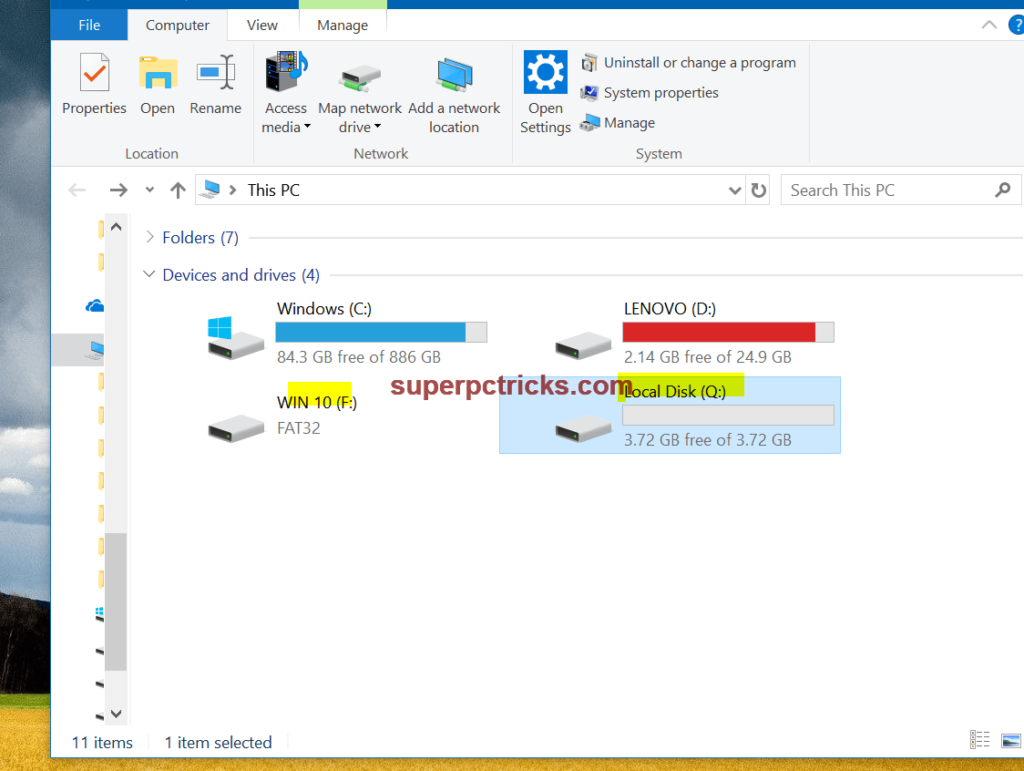
Now re-open VeraCrypt, select a drive letter for your formatted USB stick (not its original letter), click Select Device, choose your USB stick, then click OK. Next, click the Mount button, type the password you created, then click OK. When the pop-up window disappears, your USB stick is ready. Close the program, open My Computer, and you’ll see the drive letter you chose. Click it twice to access your USB stick.
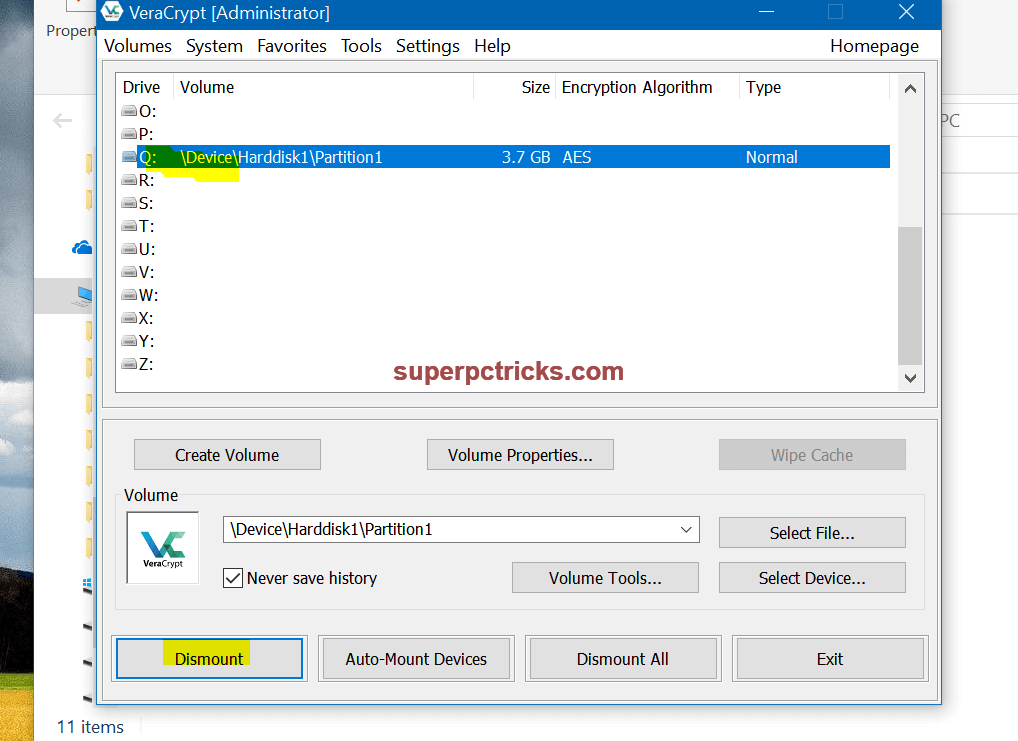
When you’ve finished working from your USB stick, open VeraCrypt, click to select the drive letter you chose in above step, Click Dismount, then Exit to close VeraCrypt. Now open My Computer on your PC. You’ll see your USB stick listed under its original drive letter, but you won’t be able to access it. If you try to open it, you’ll see a message saying the drive is empty. Disregard any messages to format your drive (it’s how VeraCrypt disguises your USB stick). Remove the USB stick if you no longer need it.
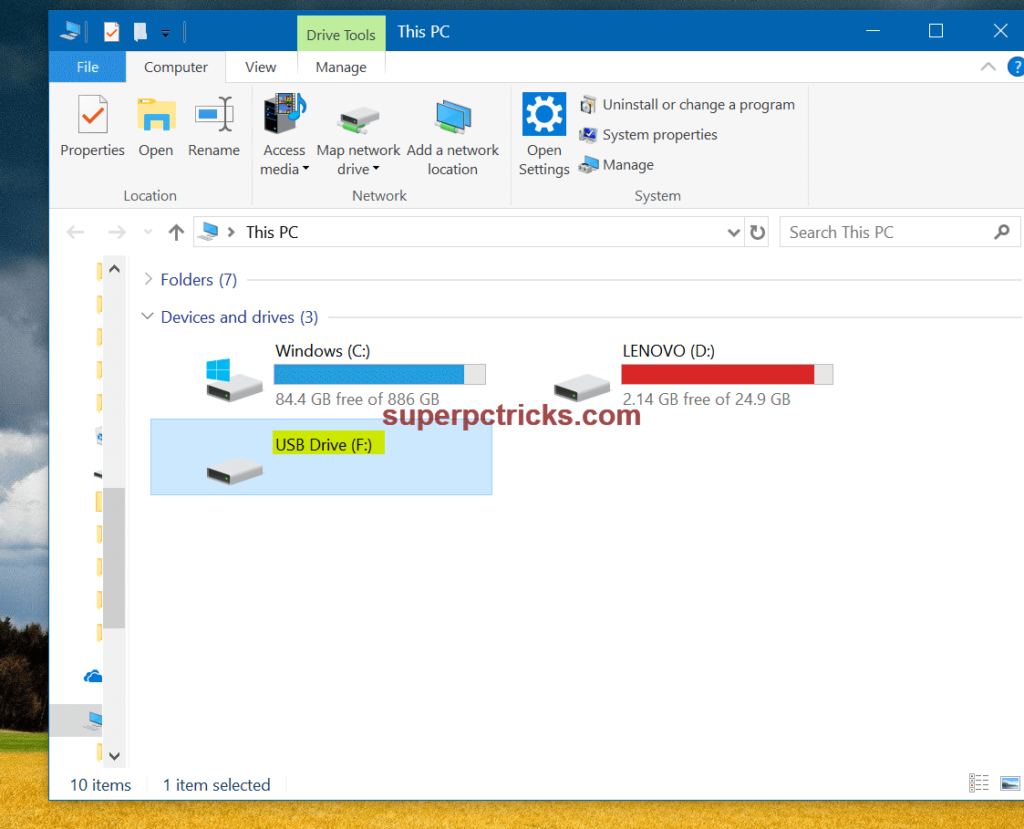
From now on, Ignore any pop-up messages whenever you insert the USB stick into your PC. To decrypt your USB stick, repeat the instructions in above step -open VeraCrypt, select any drive letter you want (besides its original drive letter), click Select Device, select your USB stick, then click OK, Mount, enter your password, then click OK again. Now open My Computer. You’ll see the drive letter you selected and a dummy drive. Open the former to access the contents of your USB stick. Repeat the above to encrypt your USB stick when you’ve finished. Your files will now be secure from hackers and snoopers.
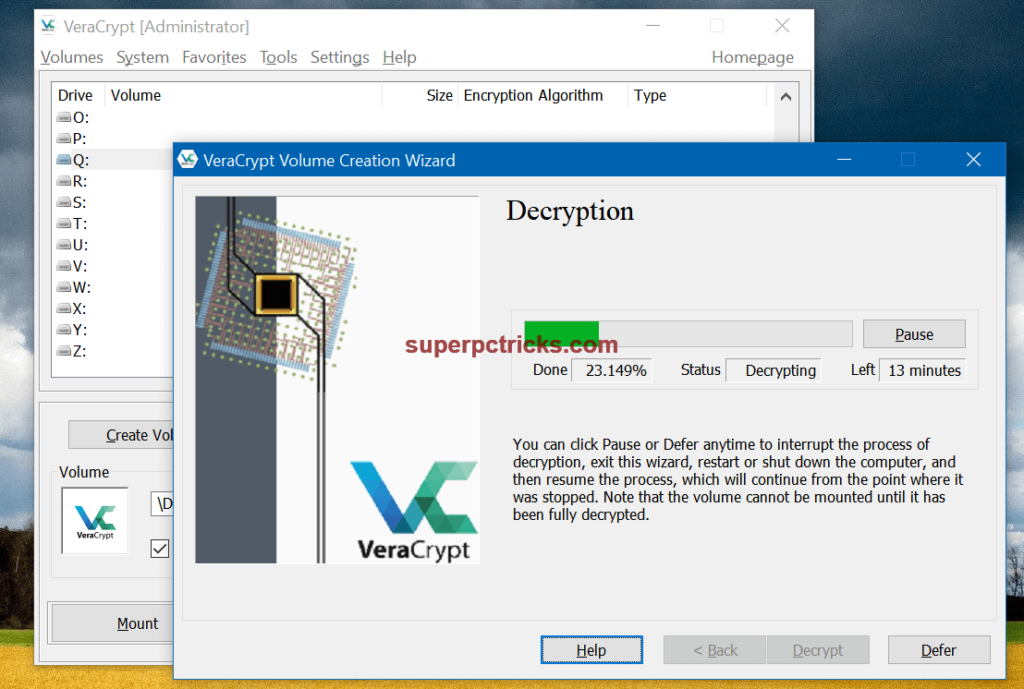
If you want to decrypt the USB drive permanently, click the Volume Tools option and select Permanently decrypt. Make sure you have emptied the drive before decrypting it permanently(including hidden files). It will take almost the same time to decrypt the drive(permanently) as it takes for the encryption process.
Kia, Goetz