In this post, we will talk about how you can partition your PC’s C drive into multiple volumes without formatting your entire drive. Before proceeding to the tutorial, we need to understand the concept of partitions on the disk. Partitions are the regions that separate one physical hard drive into multiple volumes. Moreover, disk partitioning is the creation of one or more regions on a hard disk or other secondary storage, so that the operating system can handle data in each region independently.
Usually, when we buy a new computer with bundled windows, there is only one volume of size equal to that of the hard disk. At this point, you may ask – Why there is a need for partitioning the hard disk into multiple volumes.
Partitioning allows separation of the operating system (OS) and program files from user files. In this case, you can image, backup or clone only operating system and installed programs instead of the entire disk, which will save you lots of time and space.
Dual boot is another reason for Partitioning hard drive into volumes. This allows you to have more than one operating system on a single computer. For instance, you can install Windows 10 and Linux in different partitions of the same HDD and can choose to boot whichever operating system you want to at power-up.
Having more than one volume also helps in protecting or isolating files. This allows you to recover a corrupted file system or operating system installation easily because one partition is corrupted, other file systems may not be affected.
How to Partition C Drive
How can you partition Windows 10? Usually, this task can also be performed by Windows 10 Disk Management tool. But the Disk Management tool is a little complex for most nontechie users. There is a better, simpler and powerful software – EaseUS Partition Master Free.
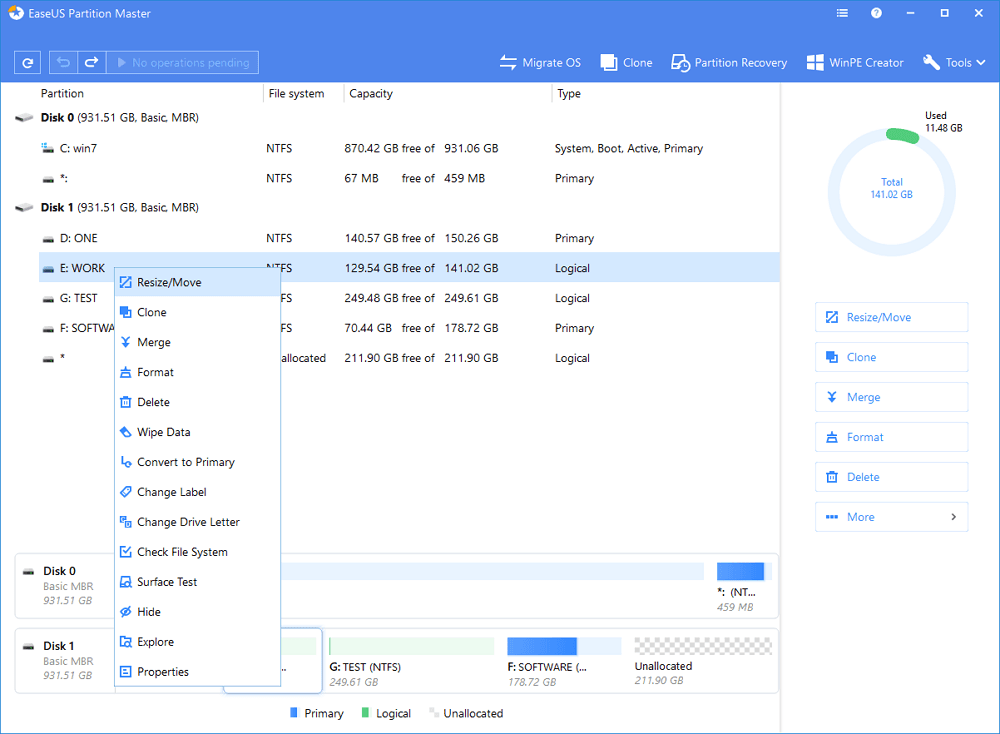
Install and launch EaseUS Partition Master from their official site. On the main window, right-click on the partition that you want to shrink and select “Resize/Move”.
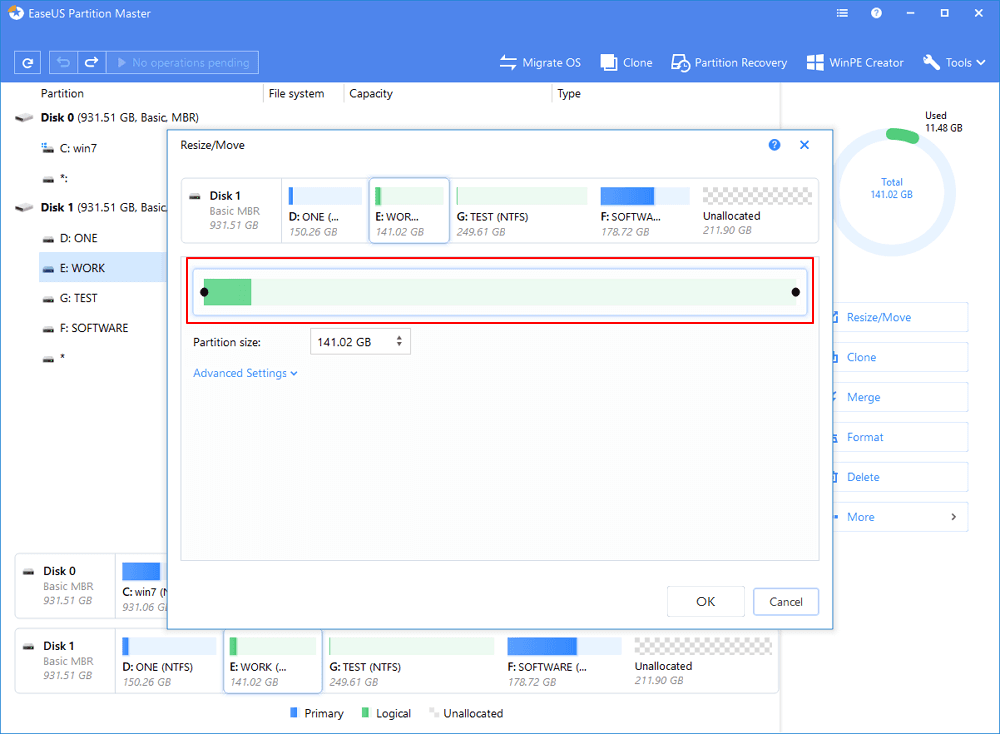
To shrink a partition, use your mouse to drag one of its ends to shrink partition space. You can also modify the partition size box to shrink the target partition. Click “OK” to continue.
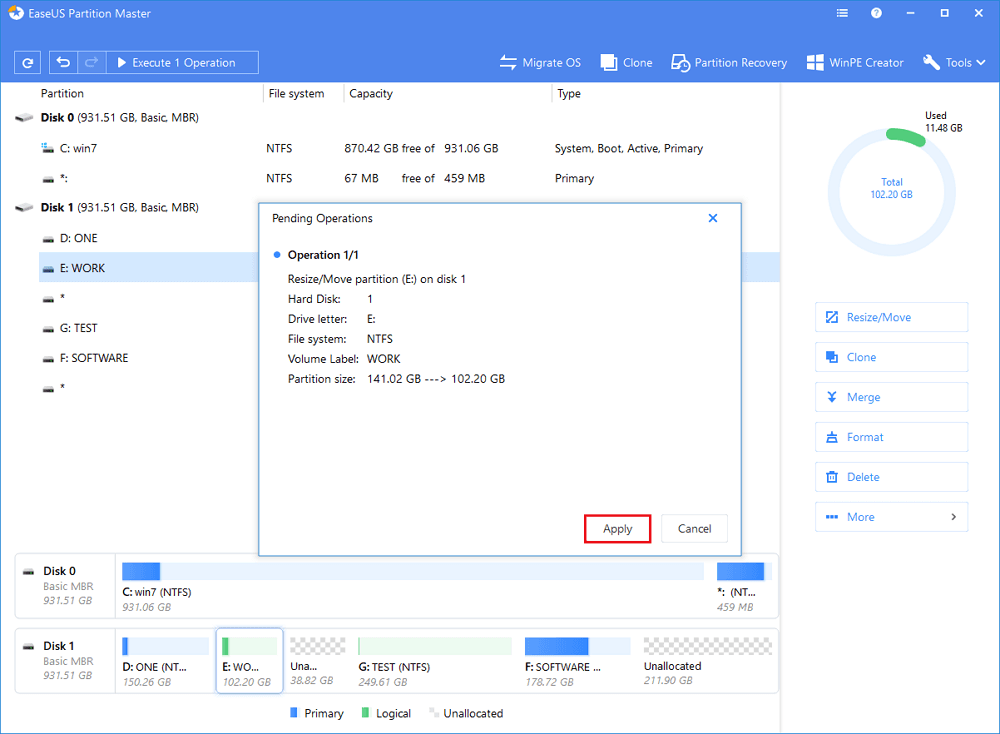
Click the “Execute Operation” button and “Apply” to keep all changes. Then, you can get unallocated space. Just open the software again and right-click the unallocated space to create a partition.
EaseUS Partition software makes it very easy and quick to create partitions on your hard drive. There is a time when you need to extend your C drive. You can use this tutorial for this purpose too.
There is one another helpful feature of EaseUS Partition Master- Conversion between GPT and MBR disks. GPT disks are faster and help with high-capacity hard disk drives so if you need to convert your regular hard disk drive MBR into GPT; you can use EaseUs that’ll do the conversion for you without any data loss.
Besides these, there are plenty of operations that you can perform on your hard disks without the fear of losing data – though I would recommend you to back up data just in case you get unlucky.
EaseUS Partition Master works with different file systems and supports up to 8.0 TB hard disks(Free version). If you want more features you can go with the pro version which costs $47.96 with free lifetime upgrades.