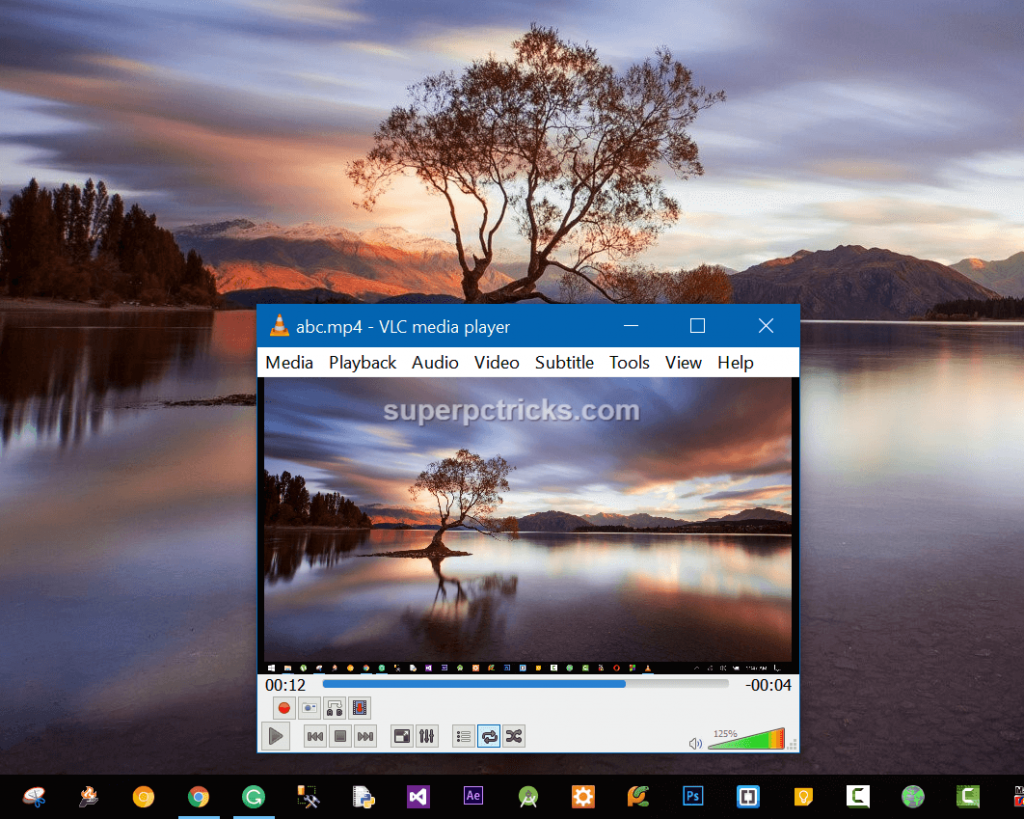
The VLC media player is the most popular media player for Windows. This amazing player can perform numerous other tasks besides playing multimedia file formats. I already shared posts regarding how VLC player can be used to trim videos and to download movie subtitles automatically. Moreover, this fantastic media player can be used as a YouTube video downloader. You might be surprised to know that VLC media player can also be used as Screen Recording tool.
Though there are many other screen recording tools available, VLC as a screen recording tool has its own merits. Unlike some other screen capturing software, it allows capturing desktop screen without any time limits. The most prominent advantage is it is open source and freely available for everyone.
Before starting the tutorial, if you already do not have VLC Media player installed on your computer, you can grab it from their official site.
Record Screen Using VLC Media Player
The method to capture screen using the VLC media player is quite simple and straightforward. You have to make use of the “Capture Devices” feature of VLC player. It is accessible from Media > Open Capture Device. Here is the step by step guide to Record Screen using VLC Media Player on Windows 7/8/10.
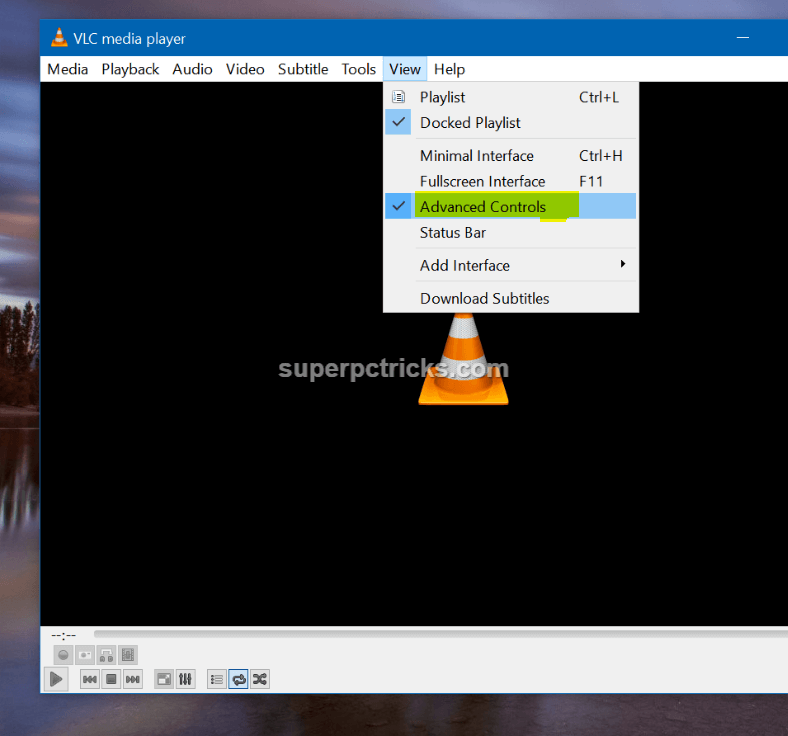
- First, you need to enable the Advanced Controls from the View tab. Open VLC media player and Under the View tab check the Advanced Controls Option.
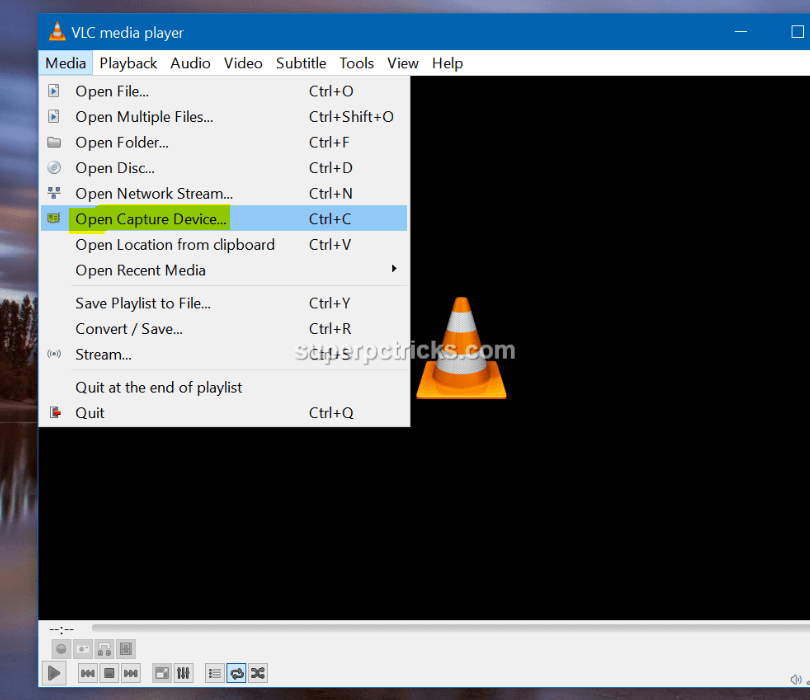
- Click Media and select Open Capture Device. You can also use the shortcut key Ctrl + C to open the capture device dialogue box directly.
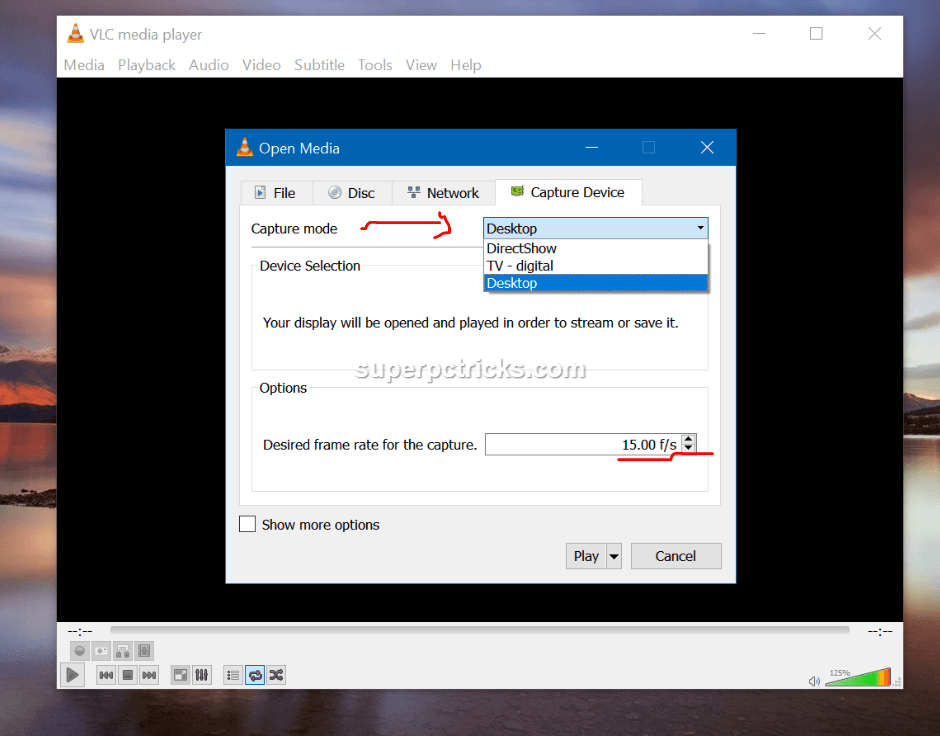
- In front of Capture mode, choose “Desktop.” Also, pick the desired frame rate. Higher the frame rate usually means smoother video, large file size and it requires much more processing power. Frame rate between 10 to 15 fps works fine.
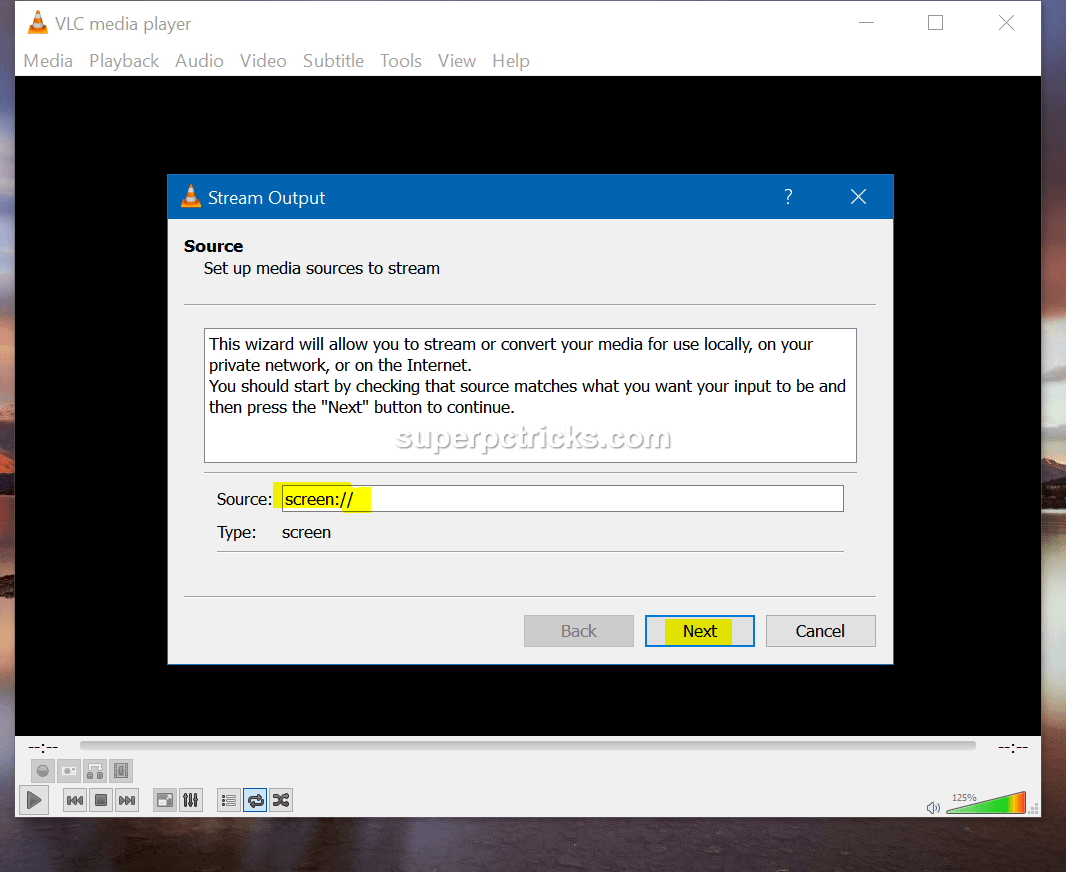
- In the bottom, press the small down-facing arrow and select Stream.

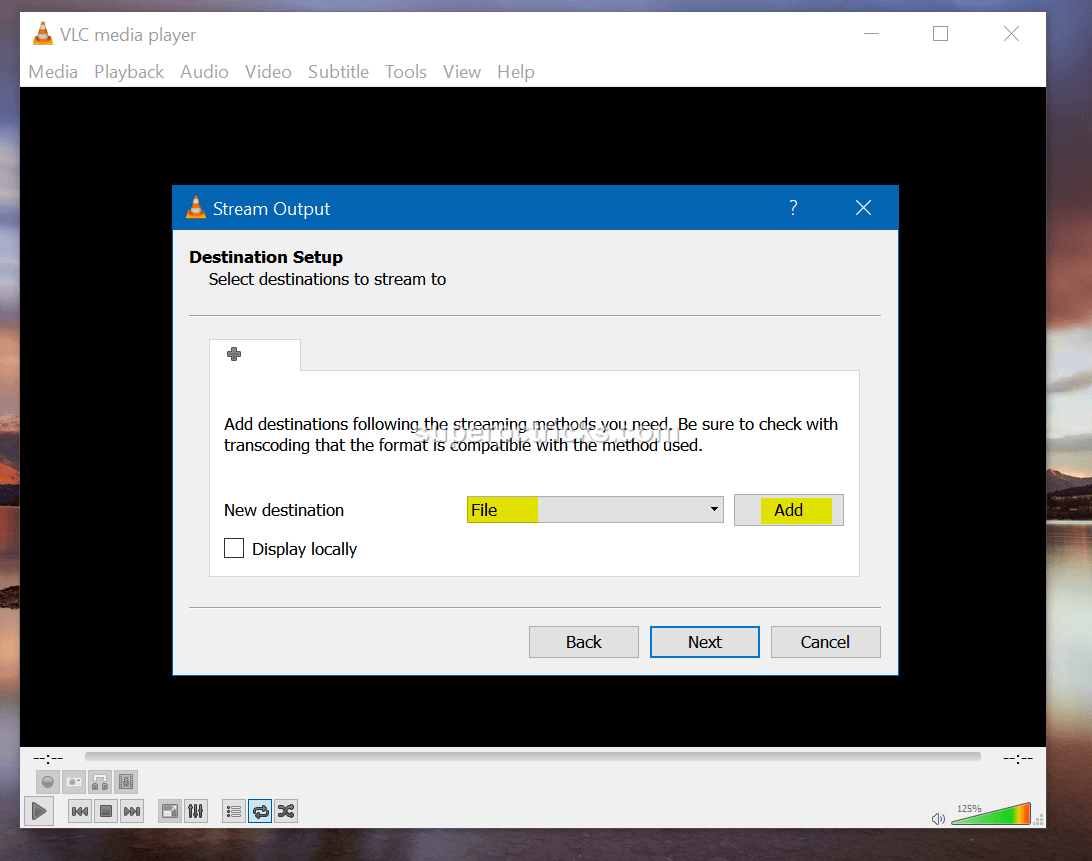
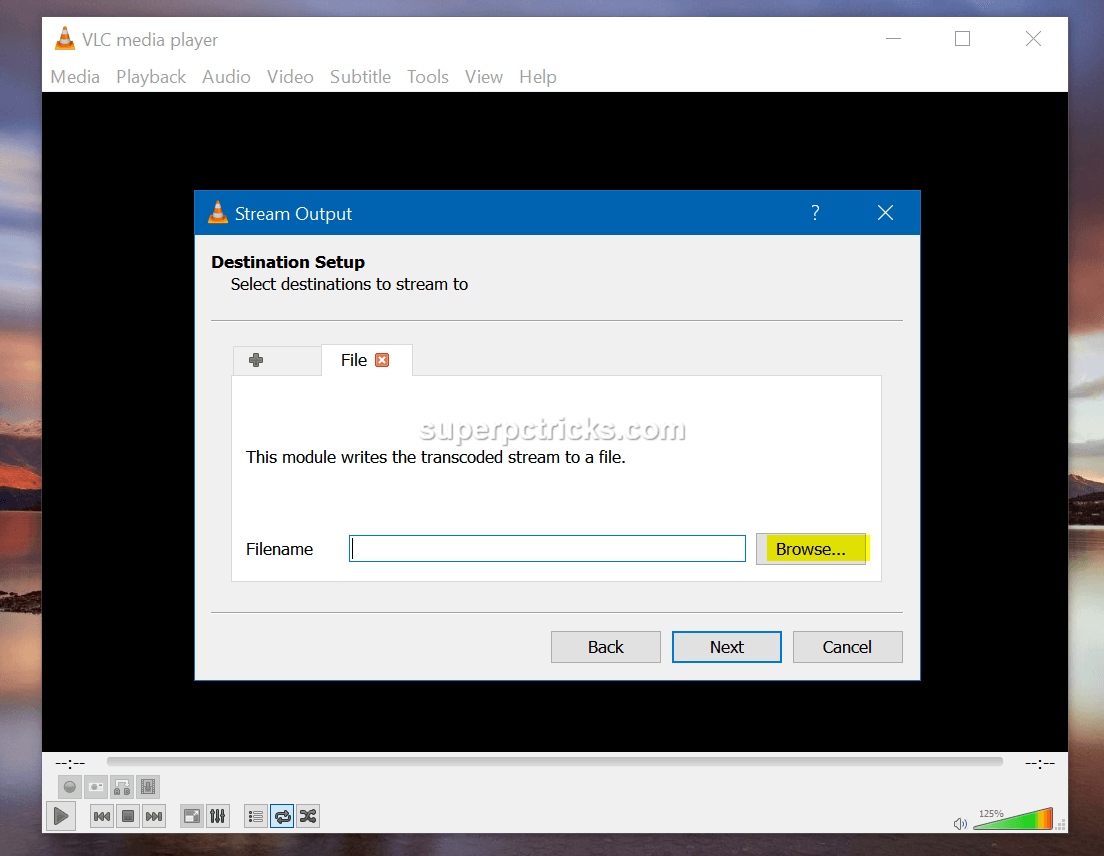
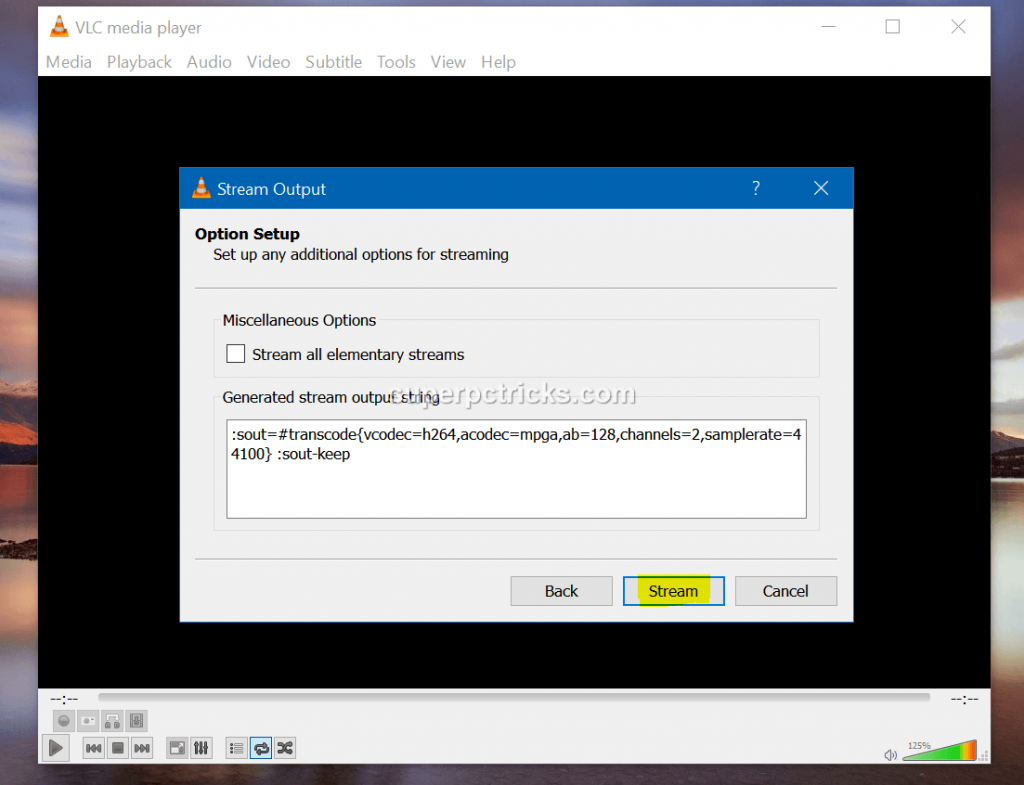
- You will see the Stream Output wizard. Click Next. Make sure the option File is selected in New destination field and click Add. Browse the location where you want to save your generated file and give it a name.
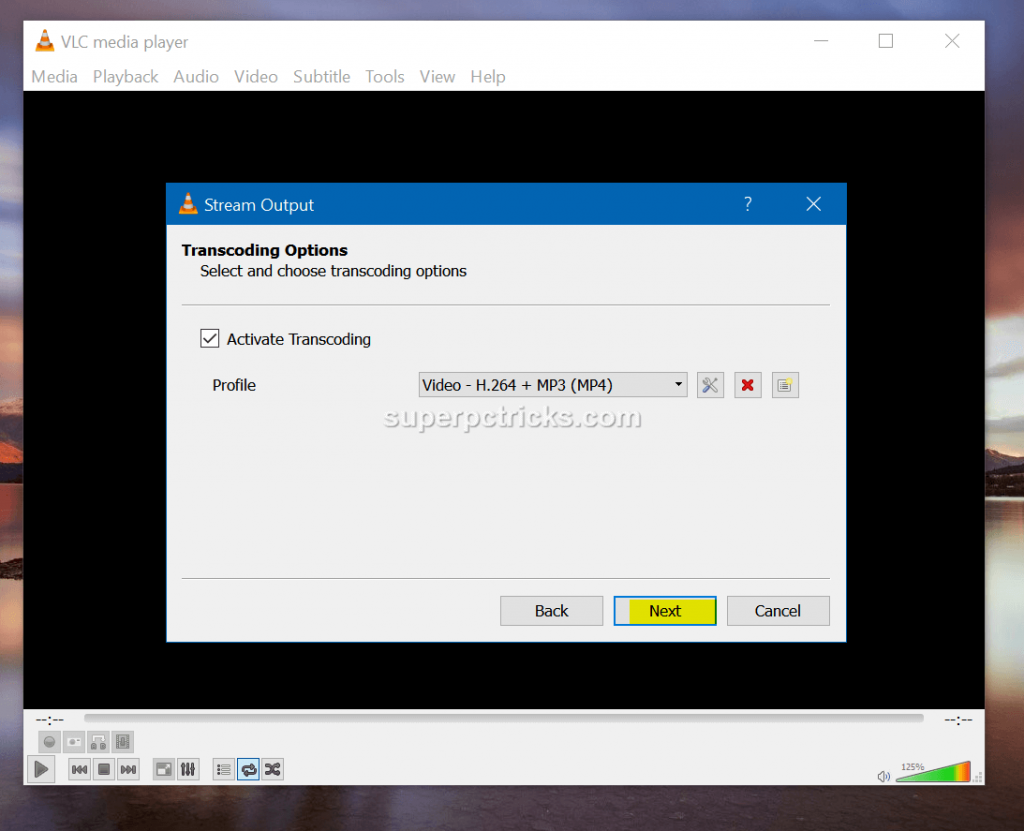
- Once done, hit Next. On the next screen, keep the defaults if you do not have an idea about video codecs. The default H264 video format works great. Hit Next.
- When you hit the Stream button, the VLC immediately starts the screen recording. Now, your Desktop screen is recorded by VLC Player which can be confirmed by the progress of the timer. You also have the option to pause the recording by clicking the play button.

To stop the recording any time, just hit the Stop (red button) in Advanced controls or close the VLC media player. Navigate to the folder that you chose to save your recording. Locate your filename and play it to see the recording.
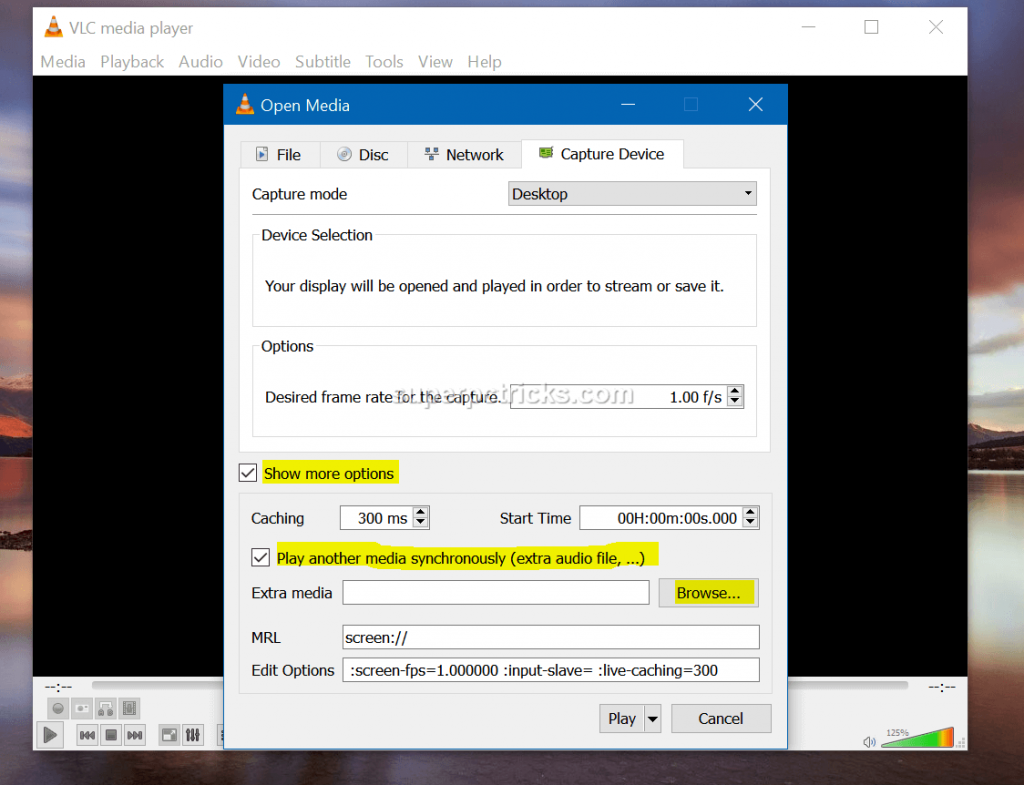
Now let’s discuss some of the cons of using VLC media player as screen recording software. First, you cannot capture audio along with the screen-capturing.
If you want your recording to have sound, you have to choose an audio file separately. On the Capturing Device menu, mark the Show more options checkbox. Check the Play another media synchrously checkbox and add the sound file.
You might notice that the mouse pointer is not showing when you play the recorded video file. This can be problematic for users who wish to record their Desktop screens for tutorial purposes. If you want the mouse pointer to be displayed while screen capturing, you’ll have to download a separate pointer image and add it to be used as the mouse image.
To do so:
- Find a mouse pointer image of your choice. If you do not have many preferences, get one from here.
- Navigate to the VLC player installation directory, i.e., C:\Program Files\VideoLAN\VLC\ and Place the downloaded cursor.png file there.
- When you reach the last step of the Stream Output wizard, just before clicking Stream, add the following at the end:
:screen-follow-mouse :screen-mouse-image=cursor.png
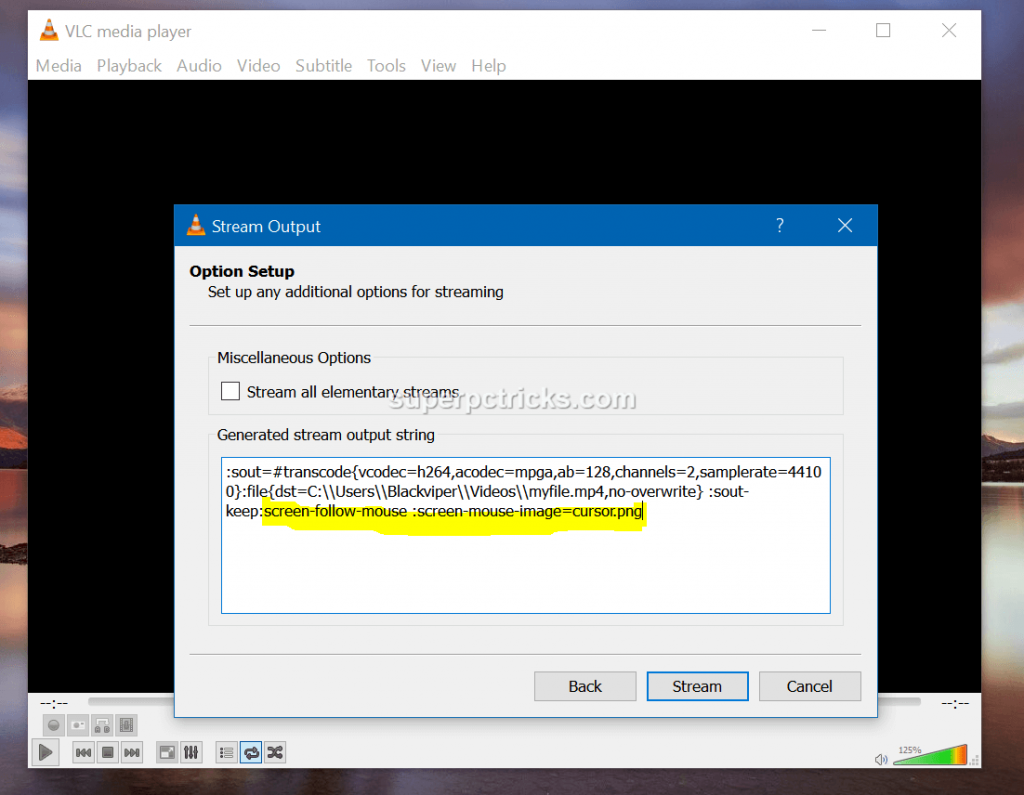
Now the mouse icon will also appear in the generated video output.
Hope you like this post. Leave a comment below if you have any queries related to this tutorial.
[…] It isn’t a possibility that you take a look around your house and don’t come across a pair of headsets. Most Millenials term it as essential. And, that may be a tad bit extreme. But, headsets do make life easier if you are into live streaming or recording on the computer. […]